|
All times are UTC - 5 hours [ DST ] |
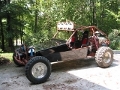
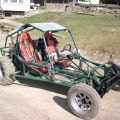
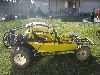
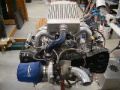
Finally cut the top off my Invader
Moderator: JeffClay
 
|
Page 1 of 2 |
[ 31 posts ] | Go to page 1, 2 Next |
|
| Author | Message | ||||
|---|---|---|---|---|---|
| aug4you |
|
||||
Joined: Thu Mar 13, 2008 1:16 pm Posts: 29 Location: Jefferson City,Tn. |
|
||||
| Top | |||||


| A. Cole |
|
||||
Joined: Sat Mar 31, 2007 4:24 pm Posts: 774 Location: Okeana, Ohio |
|
||||
| Top | |||||

| MadMike |
|
|||||
Joined: Fri Mar 02, 2007 11:55 pm Posts: 2304 Location: S.W. Pa. Wellsville Water Cooled Chapter |
|
|||||
| Top | ||||||

| DVS1 |
|
|||||
Joined: Sat Dec 30, 2006 1:06 pm Posts: 1381 Location: North of Pittsburgh |
|
|||||
| Top | ||||||

| aug4you |
|
||||
Joined: Thu Mar 13, 2008 1:16 pm Posts: 29 Location: Jefferson City,Tn. |
|
||||
| Top | |||||


| MadMike |
|
|||||
Joined: Fri Mar 02, 2007 11:55 pm Posts: 2304 Location: S.W. Pa. Wellsville Water Cooled Chapter |
|
|||||
| Top | ||||||
| Odyknuck |
|
|||||
Joined: Mon Apr 30, 2007 3:35 pm Posts: 3097 Location: Rome Ohio |
|
|||||
| Top | ||||||

| aug4you |
|
||||
Joined: Thu Mar 13, 2008 1:16 pm Posts: 29 Location: Jefferson City,Tn. |
|
||||
| Top | |||||


| MadMike |
|
|||||
Joined: Fri Mar 02, 2007 11:55 pm Posts: 2304 Location: S.W. Pa. Wellsville Water Cooled Chapter |
|
|||||
| Top | ||||||
| aboone993 |
|
|||||
Joined: Thu Jul 31, 2008 8:26 pm Posts: 1125 Location: Gadsden TN |
|
|||||
| Top | ||||||

| aug4you |
|
||||
Joined: Thu Mar 13, 2008 1:16 pm Posts: 29 Location: Jefferson City,Tn. |
|
||||
| Top | |||||
| MadMike |
|
|||||
Joined: Fri Mar 02, 2007 11:55 pm Posts: 2304 Location: S.W. Pa. Wellsville Water Cooled Chapter |
|
|||||
| Top | ||||||
| Bad Influence |
|
|||||
Joined: Wed Jun 27, 2007 11:55 am Posts: 572 Location: Georgetown, KY |
|
|||||
| Top | ||||||

| CatRunner |
|
||||
Joined: Sat Nov 01, 2008 12:28 am Posts: 16 Location: Los Angeles |
|
||||
| Top | |||||

| LUVSDIRT |
|
||||
Joined: Tue Dec 25, 2007 7:00 am Posts: 78 Location: Waxhaw, NC (Near Charlotte) |
|
||||
| Top | |||||
| harleyhunter05 |
|
||||
Joined: Mon Dec 10, 2007 7:42 pm Posts: 462 Location: toronto,ohio |
|
||||
| Top | |||||
| aug4you |
|
||||
Joined: Thu Mar 13, 2008 1:16 pm Posts: 29 Location: Jefferson City,Tn. |
|
||||
| Top | |||||


| hillaholic |
|
|||||
Joined: Wed Feb 07, 2007 4:21 pm Posts: 1560 Location: Elyria, Ohio |
|
|||||
| Top | ||||||


| aug4you |
|
||||
Joined: Thu Mar 13, 2008 1:16 pm Posts: 29 Location: Jefferson City,Tn. |
|
||||
| Top | |||||
| aug4you |
|
||||
Joined: Thu Mar 13, 2008 1:16 pm Posts: 29 Location: Jefferson City,Tn. |
|
||||
| Top | |||||


| Firebug |
|
|||||
Joined: Wed May 30, 2007 2:01 pm Posts: 5137 Location: Hazel Green, Alabama |
|
|||||
| Top | ||||||

 If your clutch ain't slippin,, you probably got it adjusted right!!!!!
| Andrew_Ha |
|
||||
Joined: Tue Mar 25, 2008 6:56 am Posts: 559 Location: EAST LIVERPOOL, OH |
|
||||
| Top | |||||
| aug4you |
|
||||
Joined: Thu Mar 13, 2008 1:16 pm Posts: 29 Location: Jefferson City,Tn. |
|
||||
| Top | |||||

| aboone993 |
|
|||||
Joined: Thu Jul 31, 2008 8:26 pm Posts: 1125 Location: Gadsden TN |
|
|||||
| Top | ||||||
| BigScott |
|
||||
Joined: Wed Feb 14, 2007 11:19 pm Posts: 202 Location: Indianapolis,IN |
|
||||
| Top | |||||
|
|
Page 1 of 2 |
[ 31 posts ] | Go to page 1, 2 Next |
|
All times are UTC - 5 hours [ DST ] |
Who is online |
Users browsing this forum: No registered users and 1 guest |
| You cannot post new topics in this forum You cannot reply to topics in this forum You cannot edit your posts in this forum You cannot delete your posts in this forum You cannot post attachments in this forum |