It is currently Sat Apr 27, 2024 2:52 pm

Board index » General » Buggy Builds

All times are UTC - 5 hours [ DST ]


Post new topic Reply to topic  [ 26 posts ]  Go to page 1, 2  Next
Author Message
PostPosted: Mon May 10, 2010 3:27 pm 
Offline
User avatar

Joined: Sat May 02, 2009 11:07 am
Posts: 88
I live about an hour / hour and a half from Turkey Bay / Land between the Lakes. Many guys from the shop both past and current have rail buggies, or atvs & dirt bikes and it's become a bit of a tradition to spent the major holiday weekends on "mancations" Last april I was ready to move onto something different I I sold my 1992 cabriolet show / weekend car at bug-a-paluza. Having grown up with a KX80, I originally planned to buy a KDX220 but as a technician in a car dealership I decided I couldn't afford any down time for broken limbs. My first car was a '74 beetle, and a few years ago I drove a '69 ~100 miles daily for about 10 months and I always wanted to have a rail buggy, so I decided to go that route instead. I didn't have much to spend, I wanted to build a rail buggy but only had the funding for an older dirt bike. After about a month of checking craigslist and samba ads I came across what I have now... got the buggy chassis and fastback for $400... was supposed to have $1000 to get it going. I might be about $100 over budget at this point, haven't added up reciepts lately, but it's pretty close. Highlights include $100 '72 stripped super beetle for the IRS and transmission, $100 rear tires... $150 seats w/ covers & belts, rear brakes are type 3 from the fastback with new 24mm front wheel cylinders and a 19mm early bus master cylinder. Front end was all disassembled and cleaned out (the old grease was rock hard) all wheel bearings have been cleaned and relubed, new seals, one rear wheel bearing was replaced due to a split inner race... Engine is the engine from the fastback converted to upright, had to reseal the "hot side" larger oil pump, oil cooler / filter kit, 009, re-jetted 34pict 3... Major projects included the IRS and cutting off the front beam where it had been welded to the buggy. I drove it for the first time on Saturday as a bit of a shake-down before paint. Still need to do a few things but it's nearly all done. Supposed to paint it this Sunday. Project has not been possible without the help of my coworker who has come over 3 different days to weld & assist. Major props to Total Performance Racing Products for helping with the tubing bends I needed. Pictures tell the story... it's not a a high dollar super buggy but it'll work great for what I want, and I can claim having built almost all of it. it's been a lot of work... sorry about the pics, but I use my photobucket for quite a bit of different things and rather than resize all the pics, I just provided a link if you wanted to see the whole picture.

Image
http://img.photobucket.com/albums/v480/vw_nick/buggy/DSCN0208.jpg

Image
http://img.photobucket.com/albums/v480/vw_nick/buggy/DSCN0216.jpg

Image
http://img.photobucket.com/albums/v480/vw_nick/buggy/DSCN0213.jpg

Image
http://img.photobucket.com/albums/v480/vw_nick/buggy/DSCN0219.jpg

Image
http://img.photobucket.com/albums/v480/vw_nick/buggy/DSCN0375.jpg

Image
http://img.photobucket.com/albums/v480/vw_nick/buggy/DSCN0391.jpg

Image
http://img.photobucket.com/albums/v480/vw_nick/buggy/DSCN0471.jpg

Image
http://img.photobucket.com/albums/v480/vw_nick/buggy/DSCN0569.jpg

Image
http://img.photobucket.com/albums/v480/vw_nick/buggy/DSCN0570.jpg

Image
http://img.photobucket.com/albums/v480/vw_nick/buggy/DSC_0176.jpg

Image
http://img.photobucket.com/albums/v480/vw_nick/buggy/DSC_0076.jpg


Image
http://img.photobucket.com/albums/v480/vw_nick/buggy/DSC_072.jpg


Image
http://img.photobucket.com/albums/v480/vw_nick/buggy/DSC_0075.jpg


Image
http://img.photobucket.com/albums/v480/vw_nick/buggy/DSC_0074.jpg


Image
http://img.photobucket.com/albums/v480/vw_nick/buggy/DSC_0073.jpg


Image
http://img.photobucket.com/albums/v480/vw_nick/buggy/DSC_0077.jpg


Image
http://img.photobucket.com/albums/v480/vw_nick/buggy/DSC_0078.jpg


Last edited by NickG on Mon May 10, 2010 5:22 pm, edited 1 time in total.

Top
 Profile  
 
PostPosted: Mon May 10, 2010 3:57 pm 
Offline
WoodsBuggy Addict
User avatar

Joined: Mon Oct 27, 2008 9:12 pm
Posts: 3891
Location: Fort Wayne, IN WoodsBuggy - NOMAD Chapter
Looks good, welcome to the sport. Reduce the size of the pics on photobucket to 480 x ??? it will fix the problem.

_________________
[url=http://www.TickerFactory.com/]
Image
[/url]


Top
 Profile  
 
PostPosted: Mon May 10, 2010 6:07 pm 
Offline
WB Competitor
User avatar

Joined: Wed Mar 18, 2009 11:19 am
Posts: 506
Location: Clarksville TN
buggy looks good. you going to turkey bay for memorial day weekend....if so contact me. 9318015368..names neal.


Top
 Profile  
 
PostPosted: Mon May 10, 2010 7:21 pm 
Offline
WB Contributor

Joined: Mon Dec 29, 2008 9:52 pm
Posts: 1342
Location: Mckenzie, TN
welcome, you did a fine job looks good!

_________________
lets just ride


Top
 Profile  
 
PostPosted: Mon May 10, 2010 11:29 pm 
Offline
WoodsBuggy Addict
User avatar

Joined: Tue Jan 08, 2008 8:53 pm
Posts: 3056
Location: Atlanta, GA
Great Job on the build and welcome to the sport... Thanks for posting the pics.

_________________
Woodsbuggy forum is now on the Tapatalk Mobile app... (iPhone, iPad and Android devices)


Top
 Profile  
 
PostPosted: Tue May 11, 2010 10:59 am 
Offline

Joined: Wed Dec 17, 2008 5:56 pm
Posts: 783
Location: mooers hill IN
Keep up the good work.


Top
 Profile  
 
PostPosted: Tue May 11, 2010 11:23 am 
Offline
WB Videographer
User avatar

Joined: Thu Jan 25, 2007 10:31 pm
Posts: 675
Location: Somerset, KY
Great budget build! 8)

_________________
Mike
Got Honda?


Top
 Profile  
 
PostPosted: Tue May 11, 2010 12:03 pm 
Offline
BOTM Winner
User avatar

Joined: Wed Nov 07, 2007 2:07 pm
Posts: 1599
Location: Petersburg, Ky
Looks great!

_________________
Maybe you should chug on over to mamby pamby land....


Top
 Profile  
 
PostPosted: Tue May 11, 2010 6:49 pm 
Offline
User avatar

Joined: Wed Jun 11, 2008 7:35 pm
Posts: 274
Location: west kentucky
looking good


Top
 Profile  
 
PostPosted: Tue May 11, 2010 7:35 pm 
Offline
WB Contributor
User avatar

Joined: Thu Jul 31, 2008 8:26 pm
Posts: 1125
Location: Gadsden TN
Awesome job I will be lookin' for you @ LBL


Top
 Profile  
 
PostPosted: Wed May 12, 2010 7:07 am 
Offline
User avatar

Joined: Sat May 02, 2009 11:07 am
Posts: 88
Thanks for the compliments...

Yesterday I resolved my air cleaner pre-filter issue (or lack there-of) by looking through a prime-line catalog my coworker has and picked up two pre-filters that are for a 6" diameter 3" high filter (mine is 2.5" high) I thought it would be good to have a clean one to swap out if it was especially nasty out. My cookie-tin lid doesn't clear the exhaust so it's gotta go. Maybe I can find a smaller one... (a pre-filter doesn't seem like that big of a deal but it's something I can cross off the to-do list which gets shorter every day) Last night I got it primed from the roll-cage forward... this evening I'll take off the engine & transaxle and prime the rear. Mike is supposed to pick the buggy up tomorrow so we can paint it over his place on Sunday...


Top
 Profile  
 
PostPosted: Wed May 12, 2010 11:16 pm 
Offline

Joined: Sun Dec 21, 2008 10:31 pm
Posts: 401
Location: tupelo ms
great job.Your lucky to live so close to a good riding place. keeppics coming.


Top
 Profile  
 
PostPosted: Fri May 14, 2010 12:30 am 
Offline
User avatar

Joined: Sat May 02, 2009 11:07 am
Posts: 88
dirtdobber wrote:
keep pics coming.


couple of late nights this week...

Image

http://img.photobucket.com/albums/v480/vw_nick/buggy/DSCN1079.jpg


Top
 Profile  
 
PostPosted: Sun May 16, 2010 10:49 pm 
Offline
User avatar

Joined: Sat May 02, 2009 11:07 am
Posts: 88
didn't quite get as much done today as I wanted to but the pouring down rain put a hold on things for several hours this morning. Today we got the steering column & pollow block sorted, brake master bracket added, dash-bracked added, rear cage braces added, rear light tabs added, an additional bar for the passenger seat to add one more mount since the outter corner one was unuseable, skid pan brackets added to the engine cage and the skid pan cut out, and the roof cut out and partially instaled. The roof kicked our butt tough, it's 16ga iirc, couldn't bend it to match the roofline. (yes, thicker and heavier than needed but it was what Mike had on hand left over from a different project, so free) Even tried the bobcat to push down on the back of it w/ the bucket... he doesn't have a large enough tip for his torches to heat it up. The current plan is to score it in two places and then bend it, or just cut it and weld it w/ a peak rather than a curve. It was getting to be late in the day and pouring out rain again so we put everything away. Plan to go on Wed. to finish the roof and paint. Clock is ticking...

Image
http://img.photobucket.com/albums/v480/vw_nick/buggy/DSCN1086.jpg


Top
 Profile  
 
PostPosted: Fri May 21, 2010 8:10 am 
Offline
User avatar

Joined: Sat May 02, 2009 11:07 am
Posts: 88
going to reassemble tonight! Very exciting.

Image


Top
 Profile  
 
PostPosted: Fri May 21, 2010 10:32 pm 
Offline
User avatar

Joined: Sun Nov 15, 2009 10:41 pm
Posts: 48
Location: West Liberty Kentucky
I was just watchin that other buggy on youtube a little while ago it seemed pretty powerful said somthing about gear reduction or somthing pretty cool :P

_________________
Image


Top
 Profile  
 
PostPosted: Sat May 22, 2010 4:07 am 
Offline
User avatar

Joined: Sat May 02, 2009 11:07 am
Posts: 88
time for bed!

forgot the battery tray and one retainer for the pedal assembly at home (both had been painted..was very annoyed!) took home the steering column and skit plate to paint. Also need to spray edges of roof and mount... forgot my proper camera so phone camera will have to do.

As to Mike's buggy, yeah - seems like it will work well. It has more of a street engine than a woods engine, he built it many years ago and had it in a baja bug and then a fiberglass buggy, iirc. it's an 1835, c45, 041 heads, 009, scat forged cw crank, dual dellertos, (sp?) forget what size... it's a a bit of a spaz. He spent about a month mounting the gear reductions to IRS arms. It gets very stiff in the back on acceleration but we haven't seen any hop so far.

Image


Top
 Profile  
 
PostPosted: Sat May 22, 2010 6:35 am 
Offline
User avatar

Joined: Fri Mar 20, 2009 8:13 am
Posts: 256
Location: Atlanta Indiana
Looks really good,However, I seen something in your pics that I think needs changed. I noticed that your s-arms still have the stock shock mounts attached. these shock mounts will catch and drag on every rock,root,and ledge that you try to cross,,should have cut them off and welded new ones to the top of your s-arms. Im sure others here In woodsbuggy world will agree. also, I have a feeling your not goint to like that solid floor pan as it will hold lots of dirt/mud and water. most of us use expanded metal for a floor pan so it wont hold so much plus it will lighten the buggy.


Top
 Profile  
 
PostPosted: Sat May 22, 2010 9:36 am 
Offline
User avatar

Joined: Sat May 02, 2009 11:07 am
Posts: 88
I don't disagree with the shock suggestion, but it was cost prohibited. The rear shocks I got were free (I wouldn't call them shocks though, as they don't dampen at all) Maybe it's something I'll do for next season. That being said, I've had several hours behind the wheel of a buggy with stock shocks and it wasn't a major issue on the jeep / atv trails we ride on. As to the floor, I would prefer solid to expanded to help keep the lap wake down.. also I imagine it's somewhat structural for my buggy. Plus, it was already there, so it was free, so to say. At this point I'm overbudget as it is and it quickly becomes a matter of what you want vs. what you need or can get away with.


Top
 Profile  
 
PostPosted: Sat May 22, 2010 11:27 am 
Offline
User avatar

Joined: Sat Mar 31, 2007 4:24 pm
Posts: 774
Location: Okeana, Ohio
I agree stock shock location won't help but will serve it purpose. I rode many years with a stock set-up like that. You will also get mixed answers on what type of floor to run. Run what you like/want. Some stay away from expanded metal to reduce the risk of a stick or other things coming through the floor and stabbing you. I think your buggy looks great for "NickG's low budget buggy build."

_________________
A broken clock is right two times a day.


Top
 Profile  
 
PostPosted: Sat May 22, 2010 2:22 pm 
Offline
User avatar

Joined: Fri Mar 20, 2009 8:13 am
Posts: 256
Location: Atlanta Indiana
I guess I should Have Said in my 1st reply that it is a very good looking buggy..I hope you ddnt think i was cutting it down..I was not.No offence intended !


Top
 Profile  
 
PostPosted: Mon May 31, 2010 10:23 pm 
Offline
User avatar

Joined: Sat May 02, 2009 11:07 am
Posts: 88
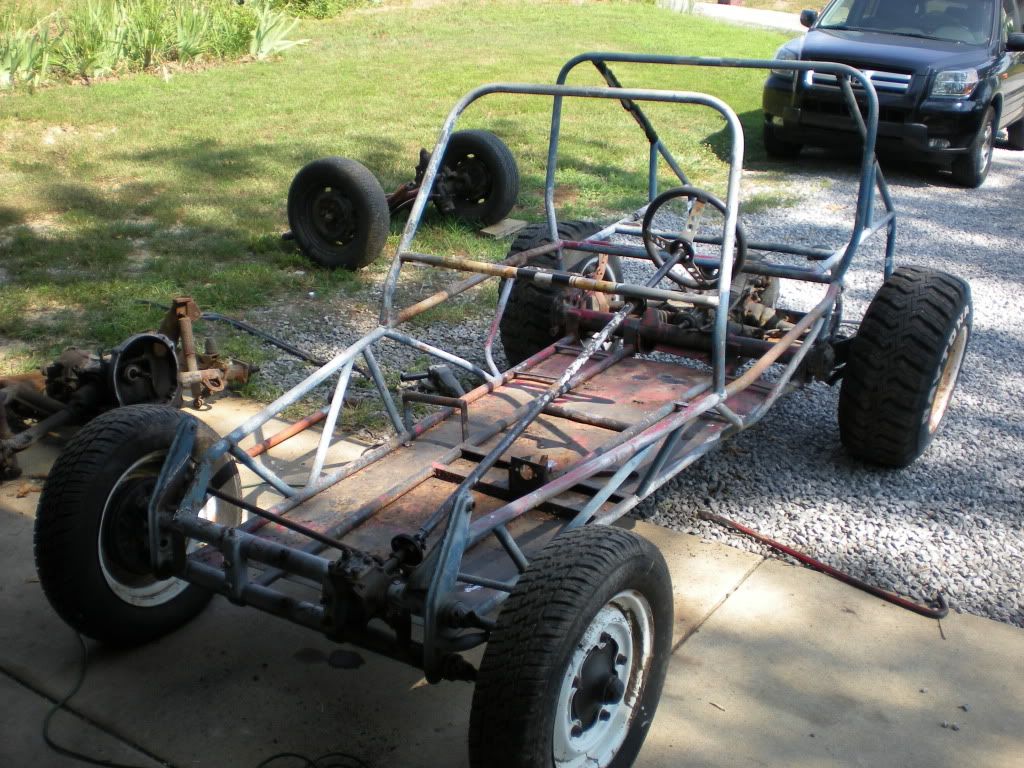
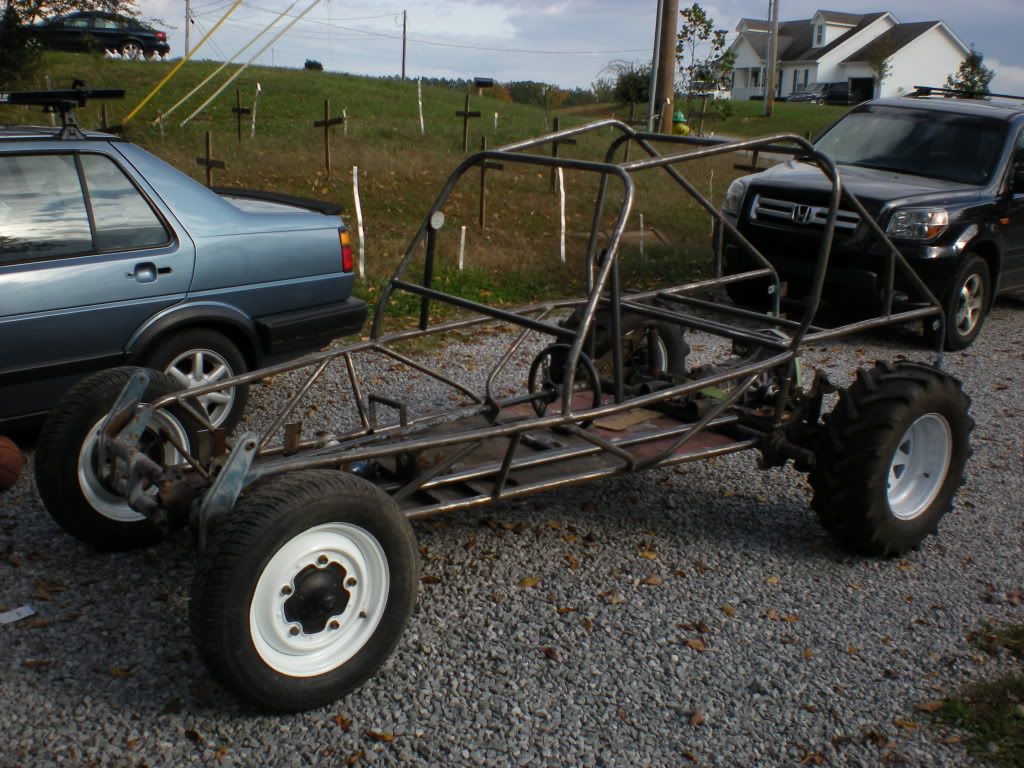
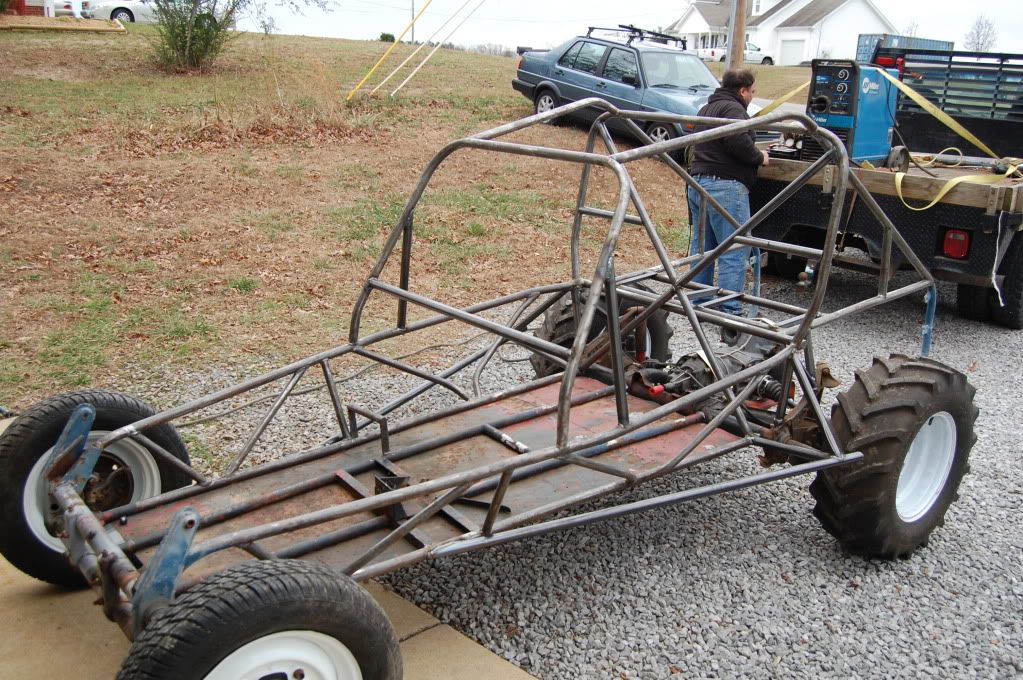
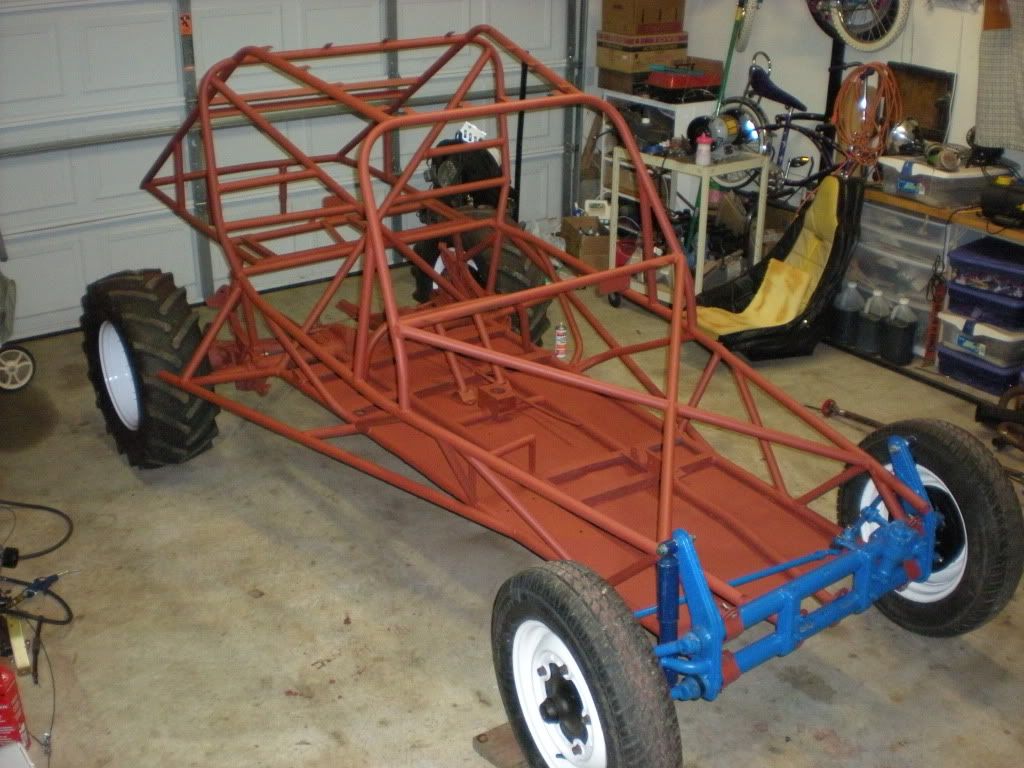
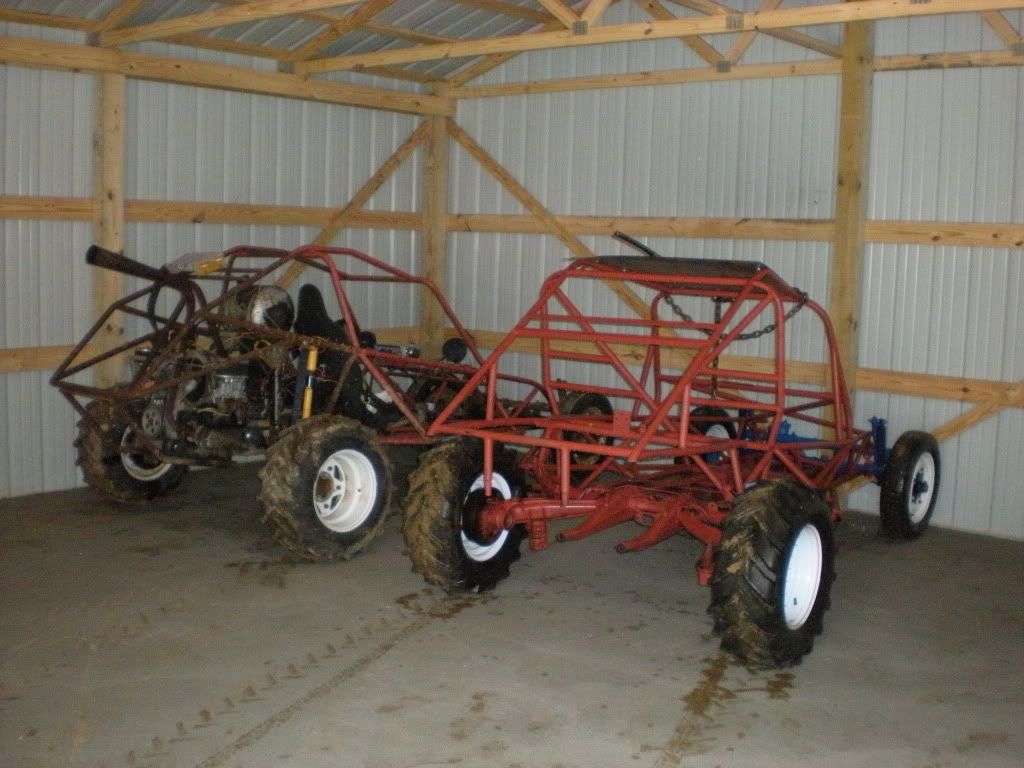
We spent 3 hours finishing it up on Friday evening....

as stated in my lbl report:

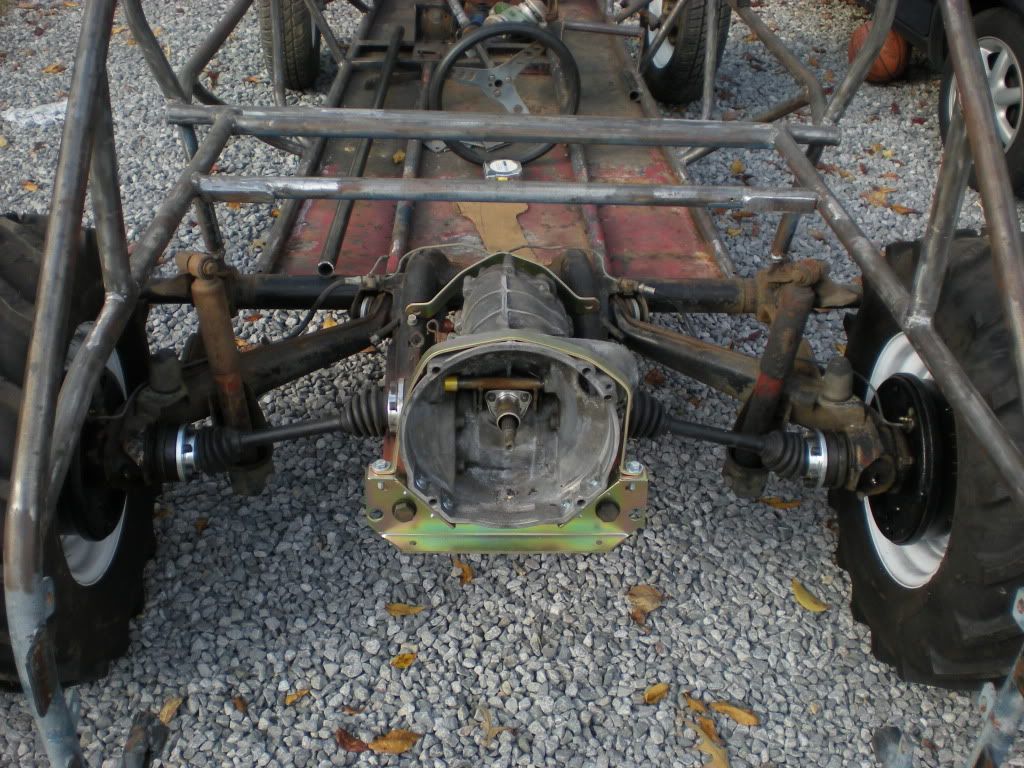
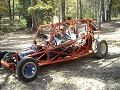
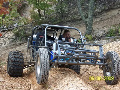
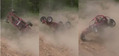
My buggy did very well for it's first time out, the only thing I broke was a rear bump stop (stock) which I'm told doesn't count. I had some running issues... I had read up on 009 and 34pict-3 hesitation problems and tried the suggested tricks but that resulted in no top end which we didn't know when tuning it on the foor at work. I dealt with it saturday and part of sunday and changed out my main carb jet to a smaller size (1 up from stock vs. 2 up from stock) and it was a completely different animal, however it suffered from a pretty big hesitation when you step on the throttle, which the other jet had resolved, so I had to constantly feather the gas to pump the accelerator pump , which I'm pretty sure we had already "turned up" all the way. I'll have to keep an eye out for a progressive weber or maybe another bugspray. Never saw a flicker from the oil pressure light which was nice... it was a bit of a question mark having not disassembled the bottom end and just running it in the shop for about 15 minutes.

the rear bottoms out going over jumps, which I expected... I need to turn up the torsion bars because after having "settled" it's got about 50% droop. That should help out a bit... I'm not planning on the shock relocate this year, maybe for next year. My brakes worked great.. very pleased with the results there... I'd really like a rear view mirror, the roof area near the center of my windshield frame was pretty clean after this weekend so it would work out, just need to find one to bolt to the roof. I'd like to get the 3 rib tractor tires for the front because the tread on the tires I have now throws a TON of mud and water, like a giant pinwheel of muck. Oh, and yeah, you really do need cutting brakes... that'll have to wait until next year too but both times I got stuck they would have gotten me out.
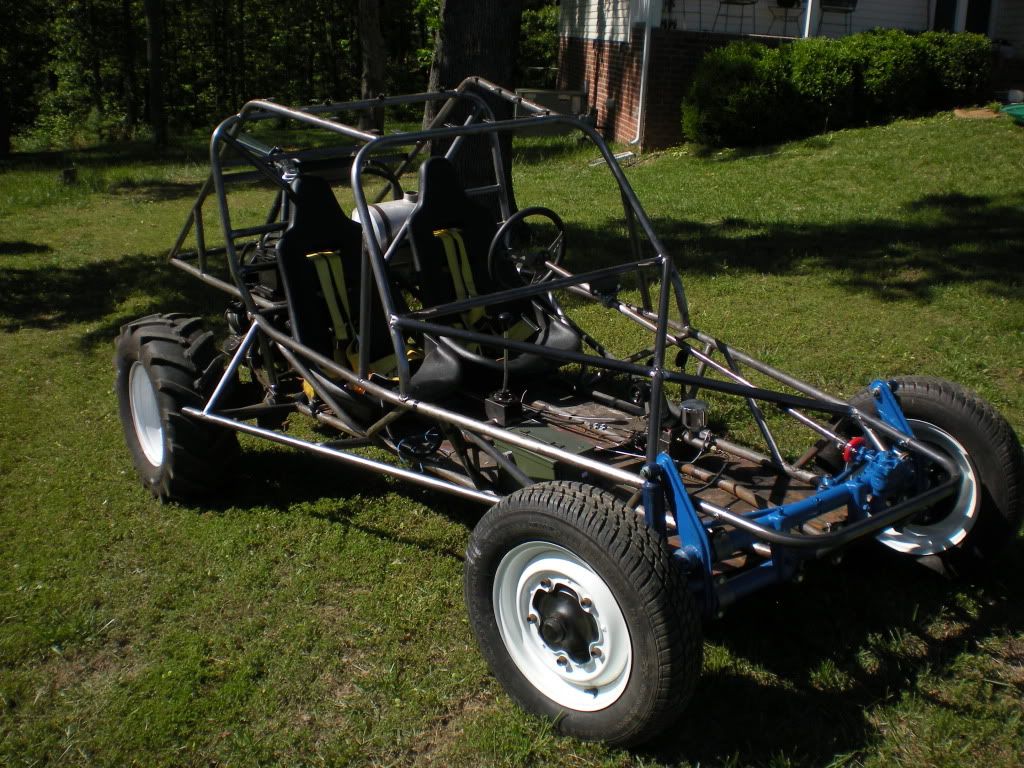
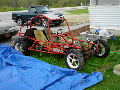

before:

Image
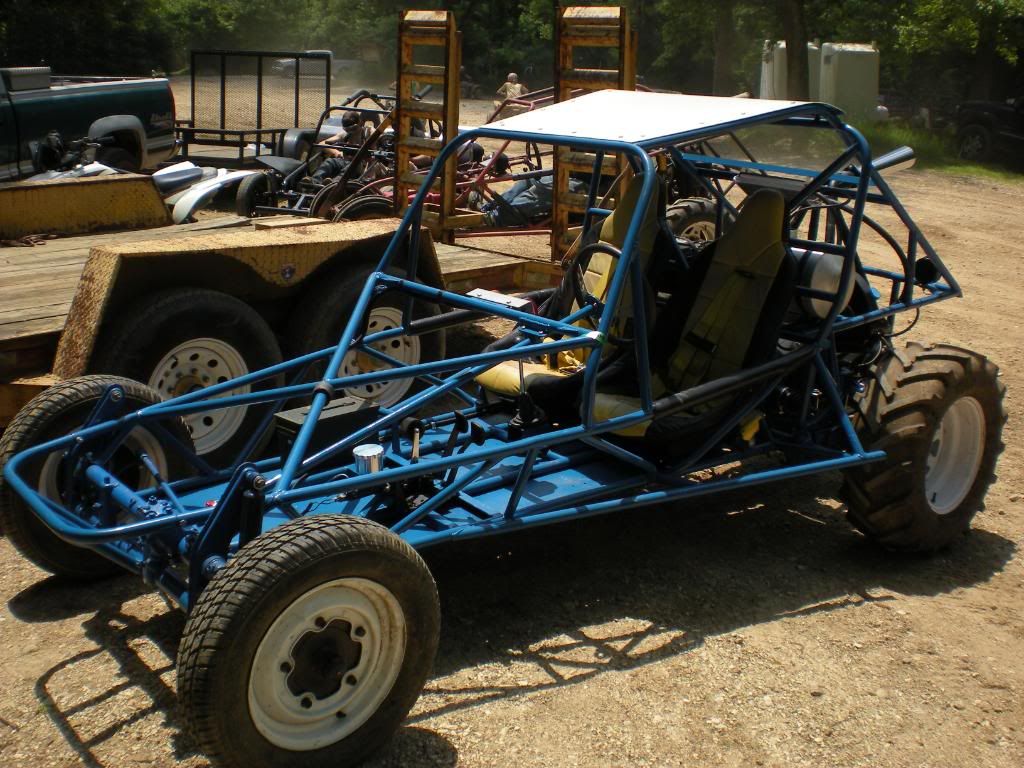
http://img.photobucket.com/albums/v480/vw_nick/LBLMemorialDay2010/DSCN1090.jpg
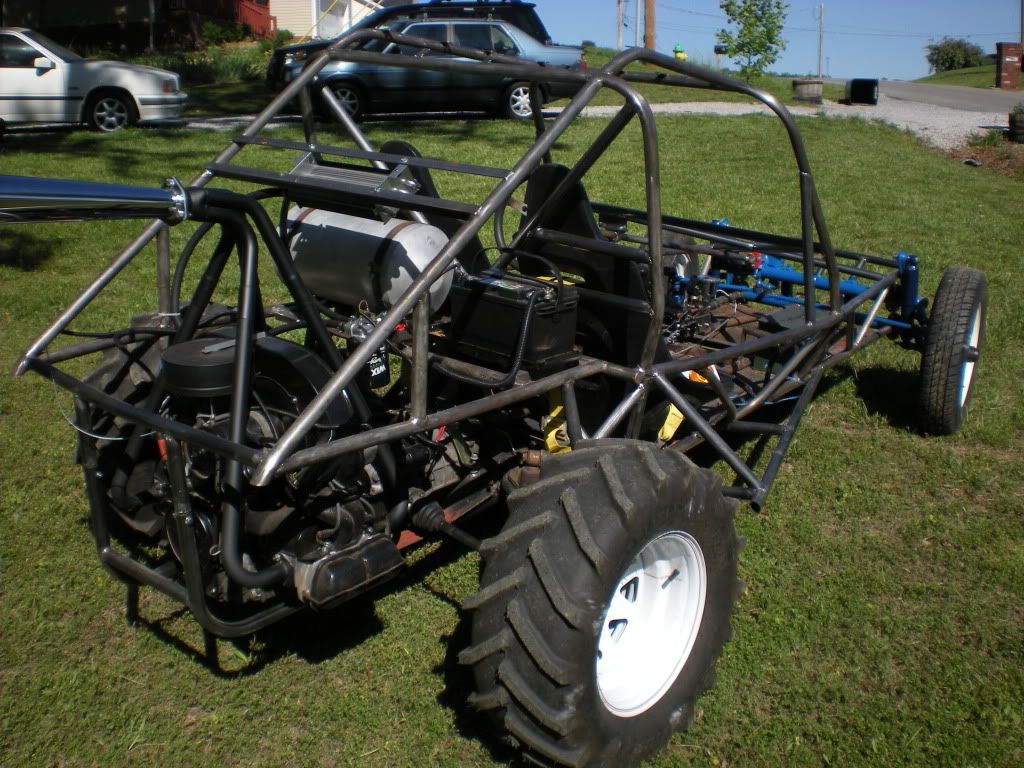
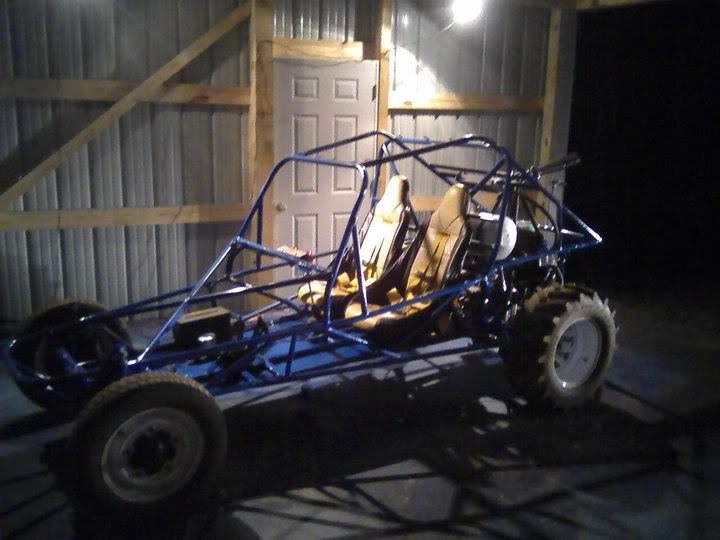
after:
Image
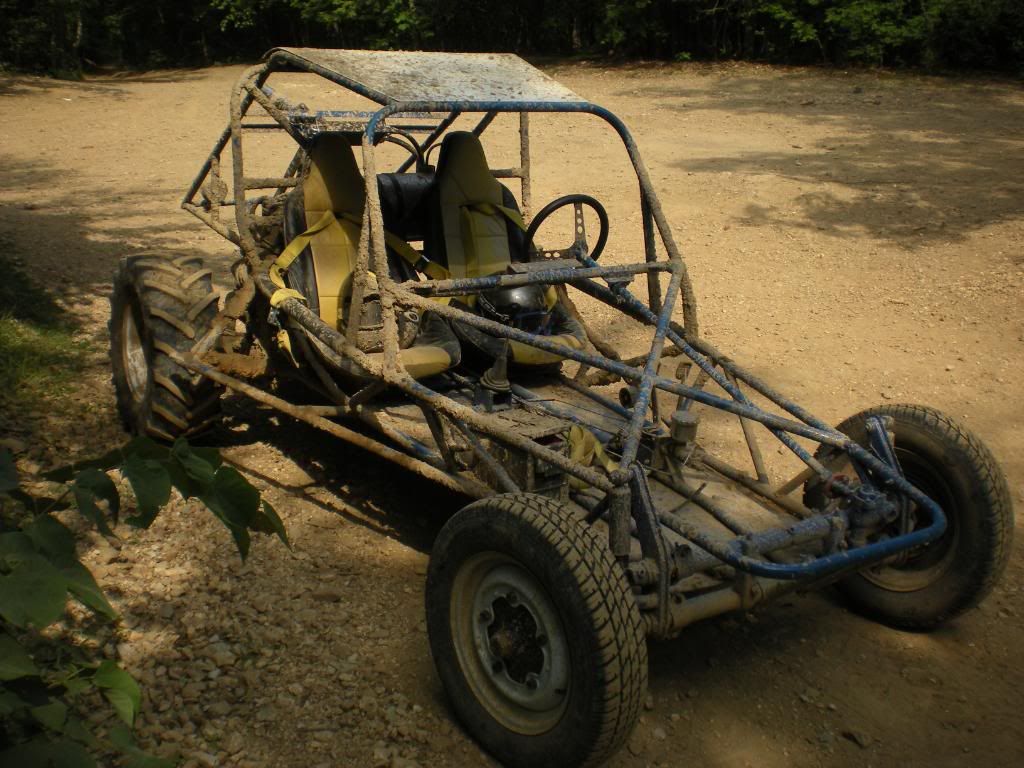
http://img.photobucket.com/albums/v480/vw_nick/LBLMemorialDay2010/DSCN1143-1.jpg


Top
 Profile  
 
PostPosted: Tue Apr 23, 2013 2:38 pm 
Offline
User avatar

Joined: Sat May 02, 2009 11:07 am
Posts: 88
I thought I would update this... since I finished the buggy it's been to LBL for 4 or 5 weekends, dropped in on a boy scout charity car show (while covered in mud!) and generally had a good time with the thing. I had added the 3rib front tires and headlights in 2011. Didn't do anything in 2012... I had originally planned boxed-in arms and longer shocks for the next revision but I decided I wanted a winch for it this year as we use my buddys quite a bit, so my tax return cookie was a superwinch terra 45. I have about 15 hours into the front bumper/winch mount. Cut off the front X bracing to add a piece to lift it up to clear the steering shaft and I also added additional roof bars to tie into the X bracing and finally finished up the rear end which I was never happy with. Used up a 22' piece of tubing. Wound up repainting pretty much the whole thing. This time with a brush, but still with the tractor paint w/ hardener added. Pretty much up to 1-2am for 2 weeks solid getting it ready to take to bug-a-paluza in East Ridge, TN which was last weekend. Looks like next playdate is LBL memorial day weekend.

Image

Image

Image

Image

Image


Top
 Profile  
 
PostPosted: Tue Apr 23, 2013 4:38 pm 
Offline
User avatar

Joined: Fri May 08, 2009 1:02 pm
Posts: 179
Location: Bradenton, FL
I like the winch, have you used it yet?
The bumper setup with looks good.
Norm


Top
 Profile  
 
PostPosted: Tue Apr 23, 2013 6:55 pm 
Offline
User avatar

Joined: Sat May 02, 2009 11:07 am
Posts: 88
It's only been on there a week. Found out Saturday the kids had been playing out in the garage and managed to suck the fair lead back against the winch and kink the cable up a bit. Not sure how the battery got turned on. Suspect the 11yr old had a hand in it. (I have a battery disconnect and also the ignition has to be on to work) Had to use a pry bar to tweek it back in place and it unwind the cable... Also had to unbolt one of the rollers to free the cable as it had fed the crimp thru them. :/ oh we'll it wasn't going to be new forever. My coworker has a champion power equipment winch from tsc and it works well... This one seems to have better specs. Also it's the same motor as the 3500lb model but has 192:1 (or close) instead of 166:1 and I think it has more cable. It draws less amps under load (tho its slower) and was about $40 more. The remote is handy for rewinding the cable while up front.


Top
 Profile  
 
Display posts from previous:  Sort by  
Post new topic Reply to topic  [ 26 posts ]  Go to page 1, 2  Next

Board index » General » Buggy Builds

All times are UTC - 5 hours [ DST ]


Who is online

Users browsing this forum: No registered users and 34 guests


You cannot post new topics in this forum
You cannot reply to topics in this forum
You cannot edit your posts in this forum
You cannot delete your posts in this forum
You cannot post attachments in this forum

Search for:
Jump to:  
Powered by phpBB® Forum Software © phpBB Group