It is currently Sat Apr 27, 2024 10:48 am

Board index » General » Buggy Builds

All times are UTC - 5 hours [ DST ]


Post new topic Reply to topic  [ 173 posts ]  Go to page Previous  1, 2, 3, 4, 5, 6, 7  Next
Author Message
PostPosted: Mon Jan 31, 2011 1:41 pm 
Offline
BOTM Winner
User avatar

Joined: Wed Nov 07, 2007 2:07 pm
Posts: 1599
Location: Petersburg, Ky
The x would be the strongest if all 4 legnths of tubeing (from the center of the x) were the same, but if you keep 'em where you've got em, just scoot them in till they touch. Of course then you'll need to notch new pieces :roll:

_________________
Maybe you should chug on over to mamby pamby land....


Top
 Profile  
 
PostPosted: Mon Jan 31, 2011 2:24 pm 
Offline
WoodsBuggy Addict
User avatar

Joined: Sun Apr 01, 2007 9:04 pm
Posts: 1625
Location: Massillon, Ohio
You might be able to fit in some of those rolled sheet metal gussets in between the the tubes and be done


Top
 Profile  
 
PostPosted: Wed Mar 02, 2011 6:26 pm 
Offline

Joined: Mon Jan 24, 2011 12:09 am
Posts: 15
Hey Big Scott, Its Tim from Buggy Works. You gonna be ready for Dirt Days?? May 14. Have it posted under upcoming events.


Top
 Profile  
 
PostPosted: Sat Apr 16, 2011 11:14 am 
Offline
User avatar

Joined: Wed Feb 14, 2007 11:19 pm
Posts: 202
Location: Indianapolis,IN
popeye08 wrote:
Hey Big Scott, Its Tim from Buggy Works. You gonna be ready for Dirt Days?? May 14. Have it posted under upcoming events.


I hope to if I can quite working so much, but if not I will still be down with the orange buggy.

_________________
When in doubt, Hit the Gas!!!!!!!

My build, http://www.woodsbuggy.com/index.php?opt ... =23&t=9147


Top
 Profile  
 
PostPosted: Sat Apr 16, 2011 11:20 am 
Offline
User avatar

Joined: Wed Feb 14, 2007 11:19 pm
Posts: 202
Location: Indianapolis,IN
Finally got to work on the buggy last night. Rail1914 came over and we got the rear cage made.

Image

Image

Image

Image

Image

You can tell I haven't been doing any fab work for the last two months, I couldn't figured out my protractor!! :oops:

Image

_________________
When in doubt, Hit the Gas!!!!!!!

My build, http://www.woodsbuggy.com/index.php?opt ... =23&t=9147


Top
 Profile  
 
PostPosted: Fri Jun 03, 2011 3:43 pm 
Offline
User avatar

Joined: Thu Feb 21, 2008 4:27 pm
Posts: 139
Location: Randolph, Ohio
Any updates? I am really intrigued by these stalker frame builds. I need more pics. On the other hand maybe you shouldn't.... It might make me to bite the bullet and order a new frame!

_________________
“Life is hard; it's harder if you're stupid.” - John Wayne -


Top
 Profile  
 
PostPosted: Sat Jun 04, 2011 1:17 pm 
Offline
WoodsBuggy Addict
User avatar

Joined: Tue Jan 08, 2008 8:53 pm
Posts: 3056
Location: Atlanta, GA
Scott.. you need to get this buggy in the trails so we can see how the Axles work. Hi degree angles would be very nice to increase ground clearance.

_________________
Woodsbuggy forum is now on the Tapatalk Mobile app... (iPhone, iPad and Android devices)


Top
 Profile  
 
PostPosted: Sat Jun 25, 2011 12:11 pm 
Offline
User avatar

Joined: Wed Feb 14, 2007 11:19 pm
Posts: 202
Location: Indianapolis,IN
MickeyMouse wrote:
Scott.. you need to get this buggy in the trails so we can see how the Axles work. Hi degree angles would be very nice to increase ground clearance.


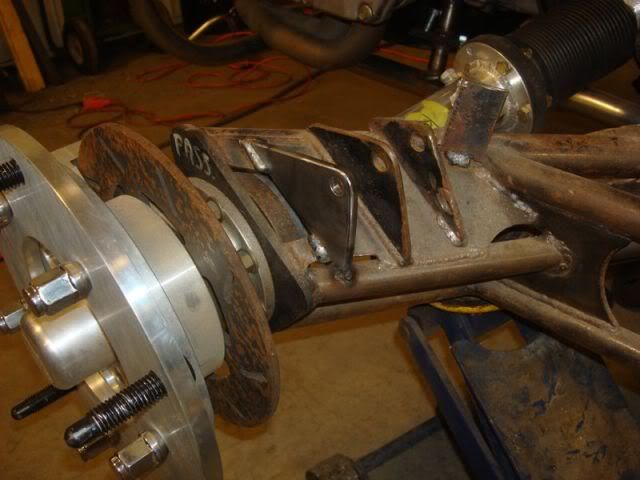
I'm trying! :? I did finally work on it last night. Rail1914 stopped by and we remade the top x brace bars and moved the lower shock mounts over. Going to use the old shock mount tab for the limit strap. Here's a couple of pics, hope to work on it more this weekend.

Image

Image

_________________
When in doubt, Hit the Gas!!!!!!!

My build, http://www.woodsbuggy.com/index.php?opt ... =23&t=9147


Top
 Profile  
 
PostPosted: Wed Jun 29, 2011 8:56 pm 
Offline
User avatar

Joined: Wed Feb 14, 2007 11:19 pm
Posts: 202
Location: Indianapolis,IN
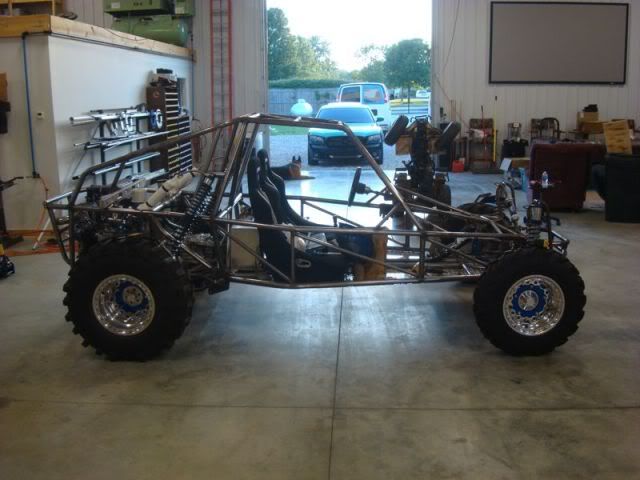
Finally have the buggy sitting on its own! We got the shock mounts made today and the shocks bolted on, it finally rolled for the first time! Still need to made the rest of the upper shock mount so it will be double shear but getting closer. Would have had the tree bars tacked on but the notcher stripped out on us. :cry:

Image

Image

_________________
When in doubt, Hit the Gas!!!!!!!

My build, http://www.woodsbuggy.com/index.php?opt ... =23&t=9147


Last edited by BigScott on Fri Jul 01, 2011 12:04 am, edited 1 time in total.

Top
 Profile  
 
PostPosted: Wed Jun 29, 2011 9:34 pm 
Offline
WoodsBuggy Addict
User avatar

Joined: Tue Jan 08, 2008 8:53 pm
Posts: 3056
Location: Atlanta, GA
Looking great.. Keep at it.. you are almost finished..

_________________
Woodsbuggy forum is now on the Tapatalk Mobile app... (iPhone, iPad and Android devices)


Top
 Profile  
 
PostPosted: Thu Jun 30, 2011 7:35 am 
Offline
WoodsBuggy Addict
User avatar

Joined: Tue Sep 08, 2009 4:43 pm
Posts: 1847
Location: rittman,ohio ----------- wellsville, water cooled chapter
great lookin car would not change a thing !
jason

_________________
Theirs no replacement for displacement !


Top
 Profile  
 
PostPosted: Thu Jun 30, 2011 8:13 am 
Offline
BOTM Winner
User avatar

Joined: Mon Apr 30, 2007 3:35 pm
Posts: 3097
Location: Rome Ohio
Now That is one Badass Buggy! :shock: :mrgreen:

_________________
Water cooled Dry Sumped Subaru Powered Turbo Charged Fuel Injected 2500CC Tank. Oh Rah! He who dies with the most Toys not only wins, He also wears them out!


Top
 Profile  
 
PostPosted: Thu Jun 30, 2011 9:13 am 
Offline
User avatar

Joined: Tue Mar 25, 2008 6:56 am
Posts: 559
Location: EAST LIVERPOOL, OH
giveitagallon wrote:
great lookin car would not change a thing !
jason


Where r the treebars

_________________
i wana ride, i wana ride, i wana ride


Top
 Profile  
 
PostPosted: Thu Jun 30, 2011 1:42 pm 
Offline
WoodsBuggy Addict
User avatar

Joined: Mon Feb 19, 2007 2:23 pm
Posts: 2039
Location: Central Indiana
Andrew_Ha wrote:
giveitagallon wrote:
great lookin car would not change a thing !
jason


Where r the treebars


BigScott wrote:
Finally have the buggy sitting on its own! We got the shock mounts made today and the shocks bolted on, it finally rolled for the first time! Still need to made the rest of the upper shock mount so it will be double shear but getting closer. Would have had the tree bars tacked on but the notcher stripped out on us.


:mrgreen:

_________________
Gary

Turbo VW Sand Racer
Polaris Ranger


"If you don't run into the Devil every once in awhile, you must be going in the same direction!"

Davis Motorsports FaceBook Page


Top
 Profile  
 
PostPosted: Thu Jun 30, 2011 11:57 pm 
Offline
User avatar

Joined: Wed Feb 14, 2007 11:19 pm
Posts: 202
Location: Indianapolis,IN
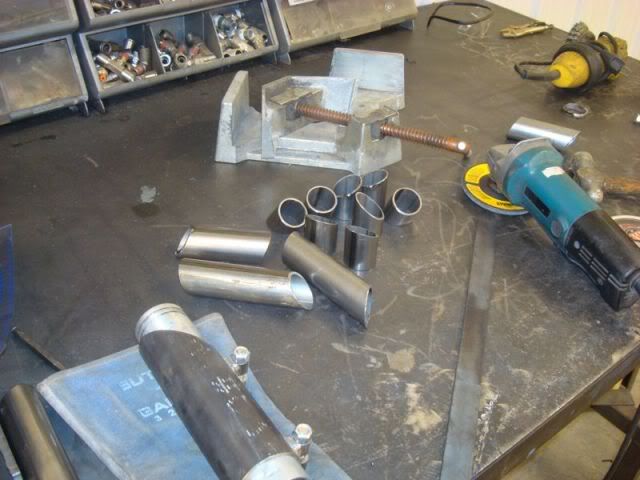
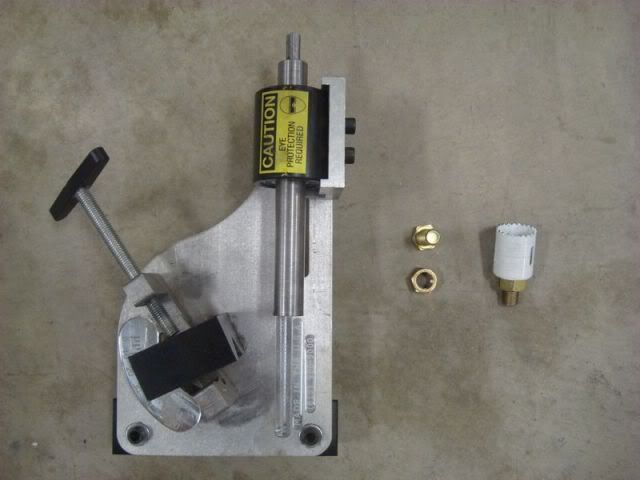
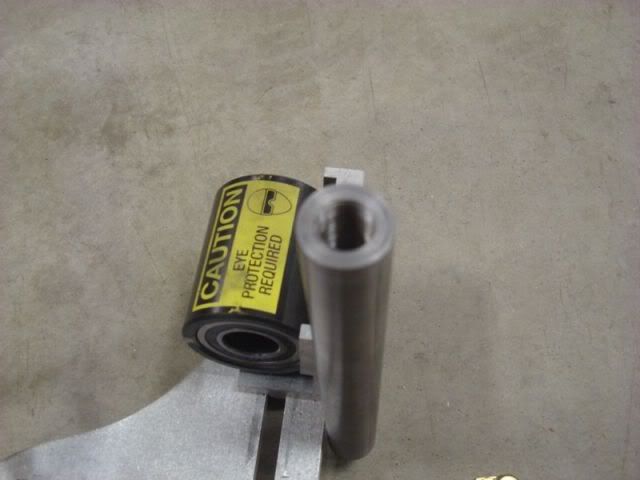
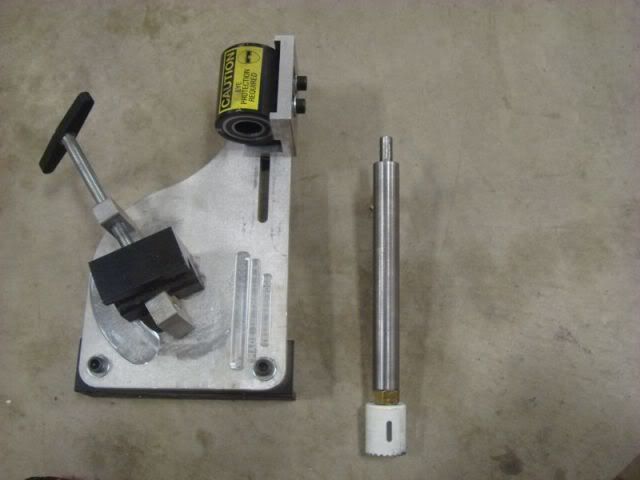
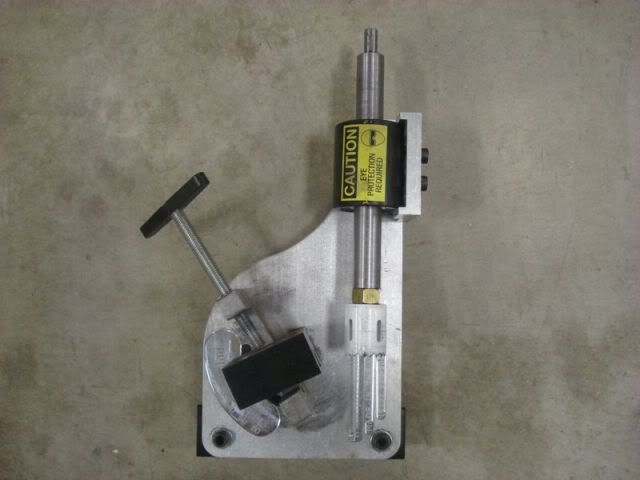
Thanks everyone, i'm trying to get it done!! As I said last night the tubing notcher stripped out on us and ended the night early, but I did get it fixed today and wanted to share this for anyone else that this might happen to. I have a pro-tooks notcher and I think a lot of others are like this also. I did call pro tools and they are sending me a new one at no charge. I didn't take a before photo of the shaft but it had a 2 stepped threaded end on it that allowed you to screw on a hole saw. The hole saw had stripped out the threads on the shaft. I came across this fix on another site and thought i'd try it. I took the shaft to a buddy who is a machinist and had him cut off the threaded end and then bore a 9/16 hole about 2" deep in it. Then we taped it to 5/8-18 thread. I then took a 1 1/2" 5/8 bolt and screwed the hole saw onto it and screwed a nut onto the bolt to lock the hole saw. Then just screw the bolt into the shaft and your ready to go, This way if you strip the hole saw out it just ruins the 5/8 bolt and not your shaft, replace the bolt and hole saw and your back in business. Here are some pics to better show what we did.

Image

Image

Image

Image

_________________
When in doubt, Hit the Gas!!!!!!!

My build, http://www.woodsbuggy.com/index.php?opt ... =23&t=9147


Top
 Profile  
 
PostPosted: Fri Jul 01, 2011 12:03 am 
Offline
User avatar

Joined: Wed Feb 14, 2007 11:19 pm
Posts: 202
Location: Indianapolis,IN
I also mocked up the double shear upper shock mounts. I'm thinking I would tie the 3 tubes together with some plate and dimple die it. What do you guys think?


Image

Image

Image

_________________
When in doubt, Hit the Gas!!!!!!!

My build, http://www.woodsbuggy.com/index.php?opt ... =23&t=9147


Top
 Profile  
 
PostPosted: Fri Jul 01, 2011 7:38 am 
Offline
BOTM Winner
User avatar

Joined: Mon Apr 30, 2007 3:35 pm
Posts: 3097
Location: Rome Ohio
I think the plate would make that area look Awsome. Because your going to dimple the plates, you could do it in 14 or even 16 gauge that would keep the weight down and add a lot of strength to the mounts.

_________________
Water cooled Dry Sumped Subaru Powered Turbo Charged Fuel Injected 2500CC Tank. Oh Rah! He who dies with the most Toys not only wins, He also wears them out!


Top
 Profile  
 
PostPosted: Sat Jul 23, 2011 11:19 pm 
Offline
User avatar

Joined: Wed Feb 14, 2007 11:19 pm
Posts: 202
Location: Indianapolis,IN
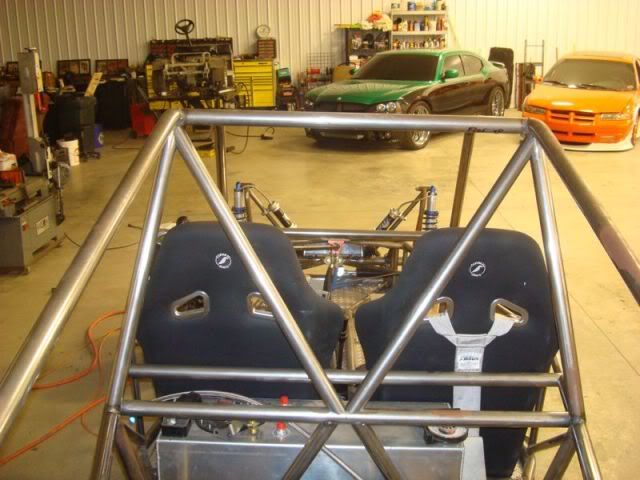
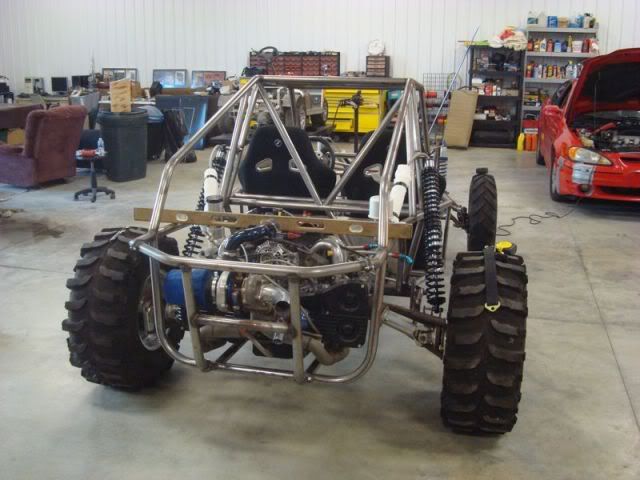
I got some more done on the buggy today, finished up the X brace, the shock mounts minus the plates and mounted 1 tree bar and made everything for the second 1. Not a bad day, got a good amount done and I think I lost 5 lbs sweating my a** off! :shock: Think it hit 97 degrees with 100% humidity!

Image

Image

Image

Image

Image

Image

_________________
When in doubt, Hit the Gas!!!!!!!

My build, http://www.woodsbuggy.com/index.php?opt ... =23&t=9147


Top
 Profile  
 
PostPosted: Tue Jul 26, 2011 12:03 pm 
Offline
BOTM Winner
User avatar

Joined: Wed Nov 07, 2007 2:07 pm
Posts: 1599
Location: Petersburg, Ky
I like them tree bars! looking great!

_________________
Maybe you should chug on over to mamby pamby land....


Top
 Profile  
 
PostPosted: Sun Jul 31, 2011 4:36 pm 
Offline
User avatar

Joined: Sat Dec 08, 2007 5:08 pm
Posts: 309
Location: lagrange oh
Its... Beautiful :cry:


Top
 Profile  
 
PostPosted: Sun Jul 31, 2011 8:59 pm 
Offline
User avatar

Joined: Thu Feb 19, 2009 8:52 pm
Posts: 774
Location: wooster ohio
duneman wrote:
Its... Beautiful :cry:


It is :!: I'm jealus too. :twisted: :mrgreen:

_________________
Turbocharged Ecotec,vanogon midshift,Berrien WoodsBuggy wagon.


Top
 Profile  
 
PostPosted: Fri Aug 05, 2011 9:28 pm 
Offline
User avatar

Joined: Wed Feb 14, 2007 11:19 pm
Posts: 202
Location: Indianapolis,IN
RaceBugg1098 wrote:
I like them tree bars! looking great!


duneman wrote:
Its... Beautiful :cry:


tw9294 wrote:
It is :!: I'm jealus too. :twisted: :mrgreen:


Thanks guys! :lol:

_________________
When in doubt, Hit the Gas!!!!!!!

My build, http://www.woodsbuggy.com/index.php?opt ... =23&t=9147


Top
 Profile  
 
PostPosted: Fri Aug 05, 2011 9:32 pm 
Offline
User avatar

Joined: Wed Feb 14, 2007 11:19 pm
Posts: 202
Location: Indianapolis,IN
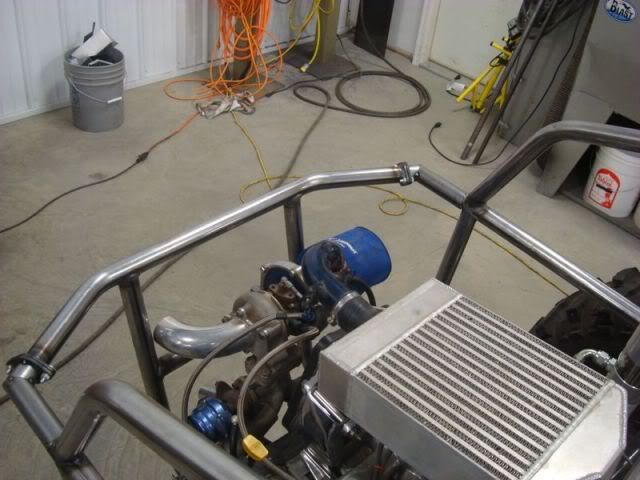
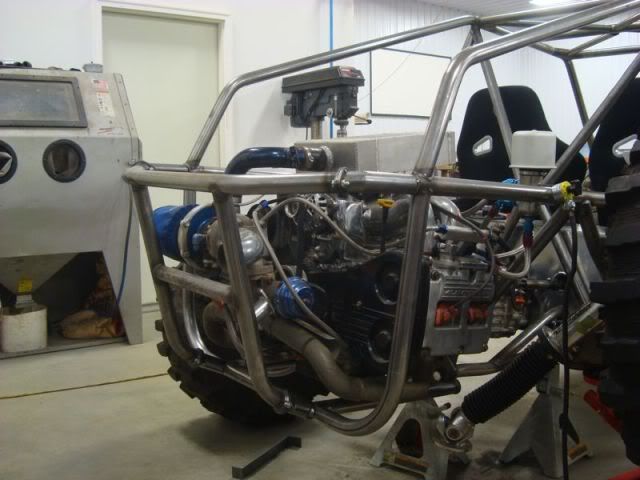
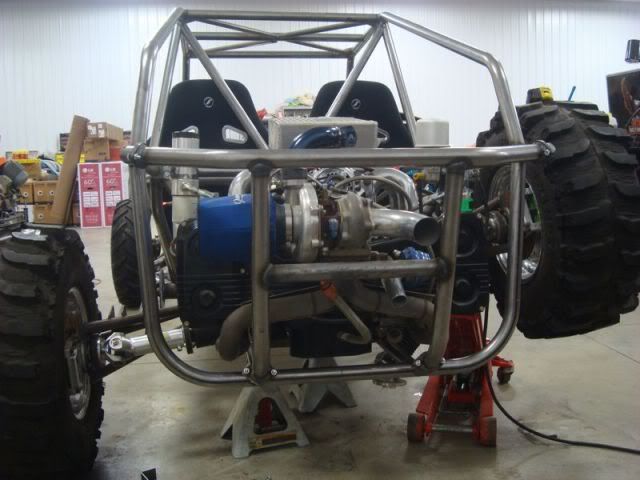
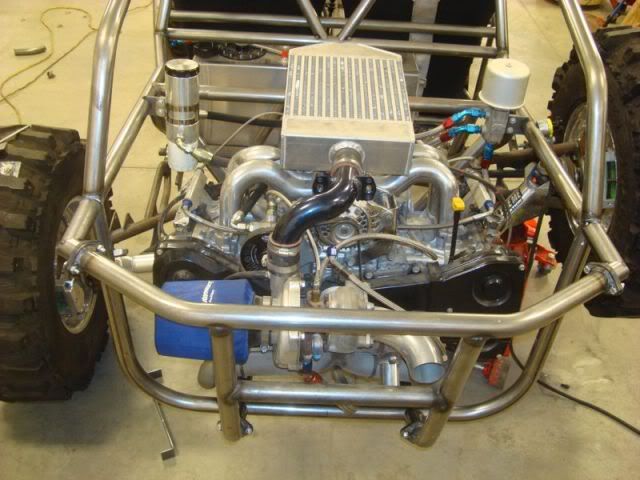
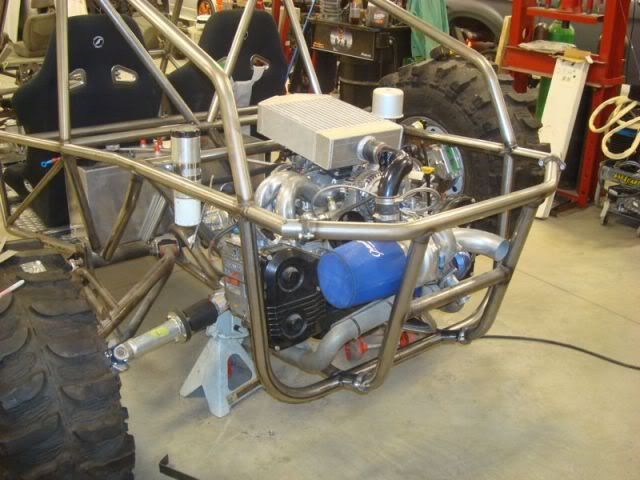
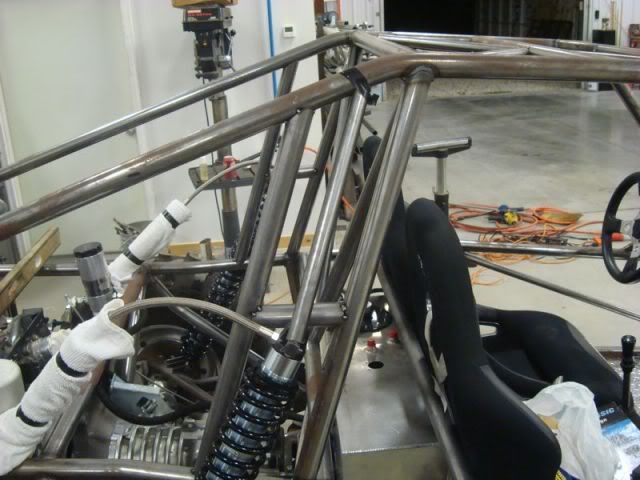
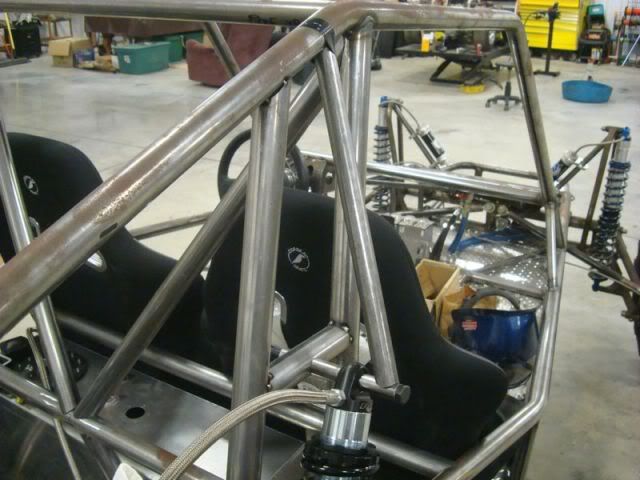
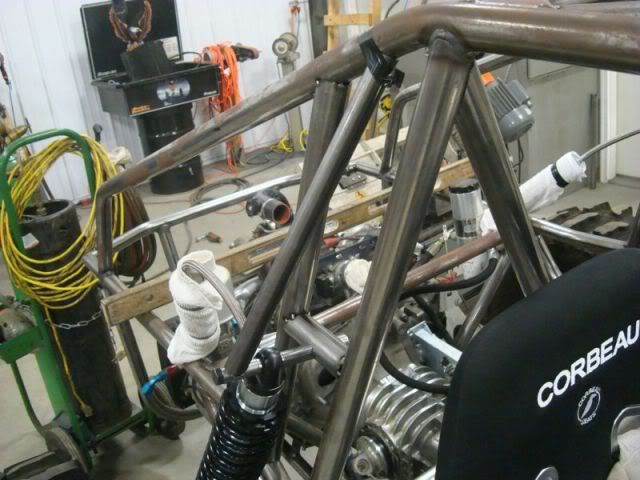
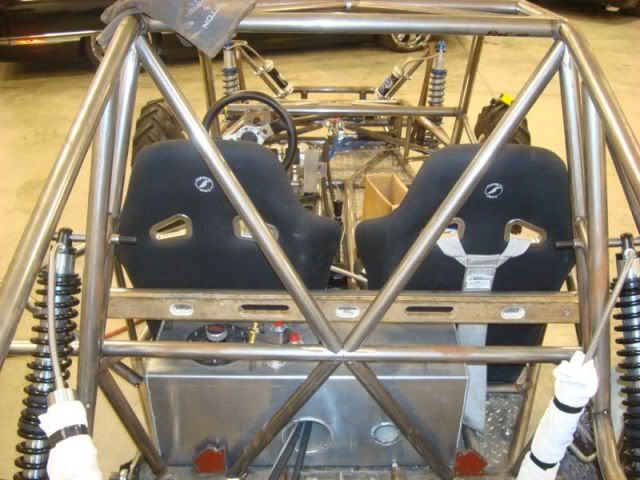
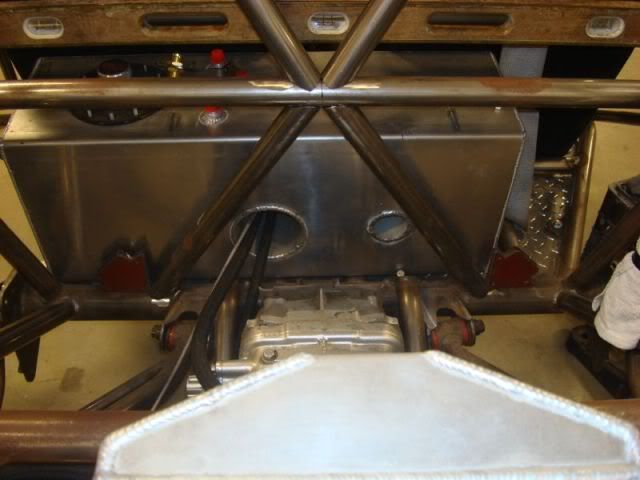
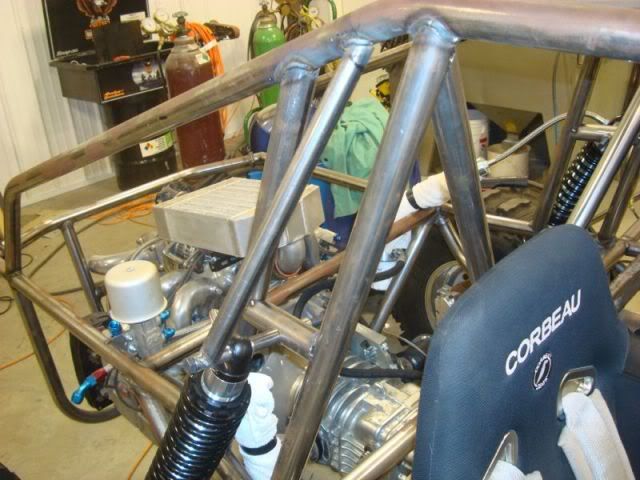
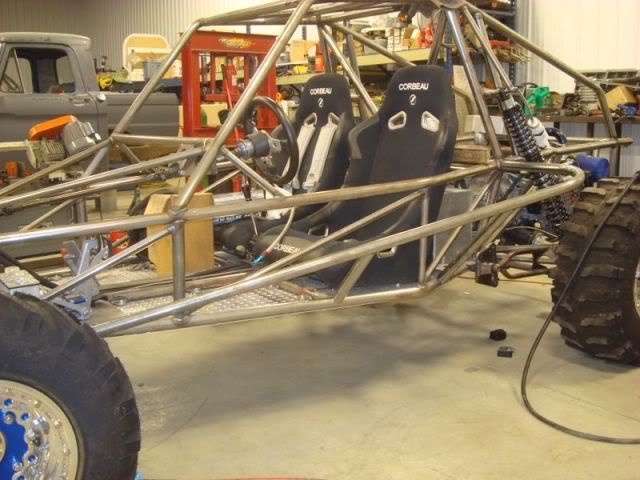
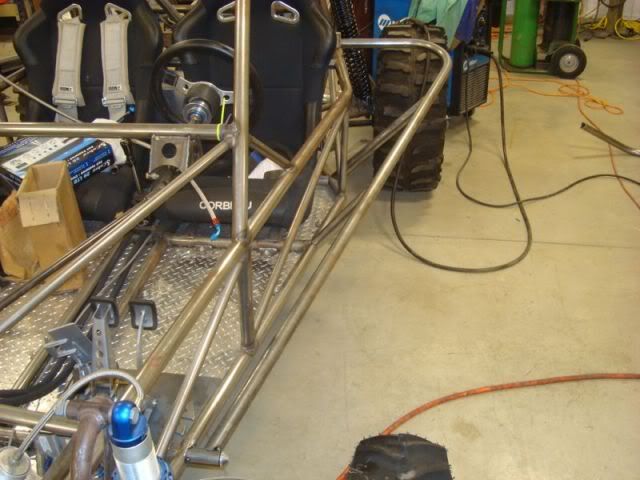
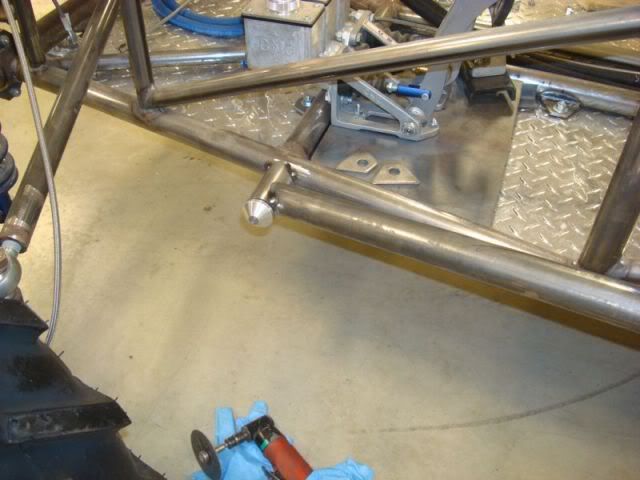
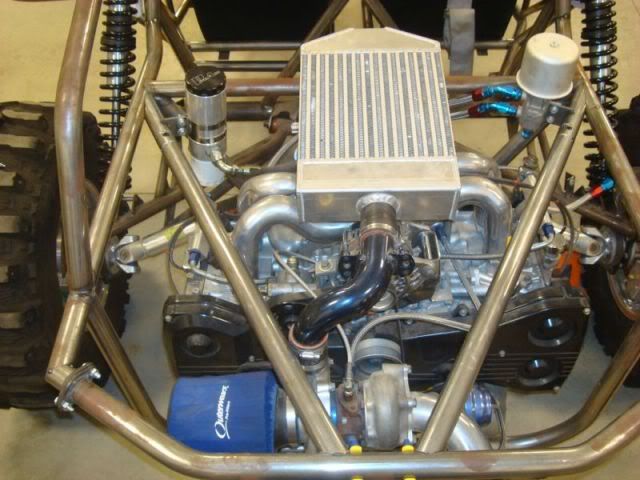
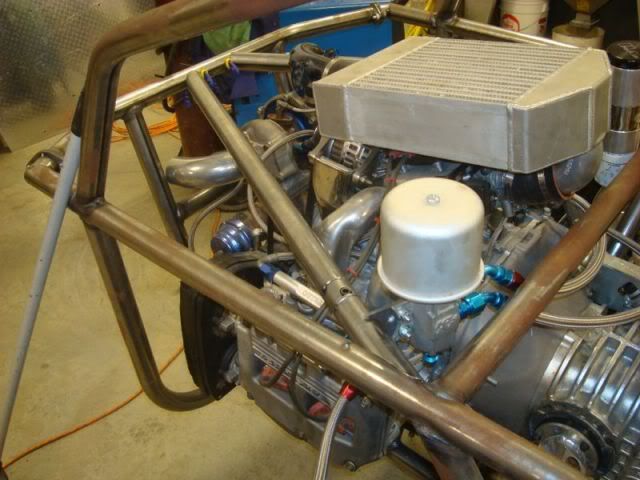
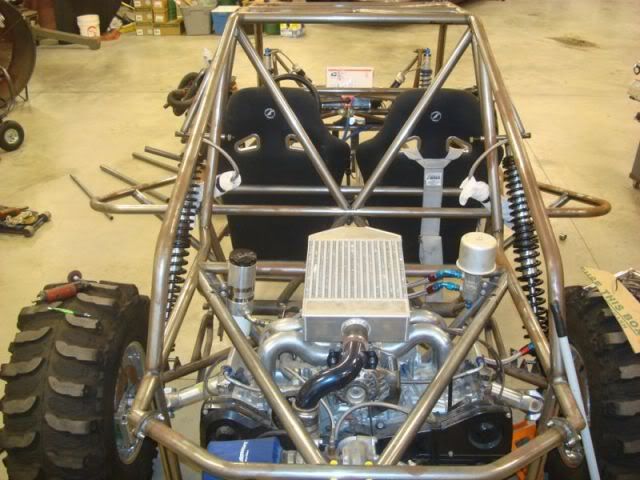
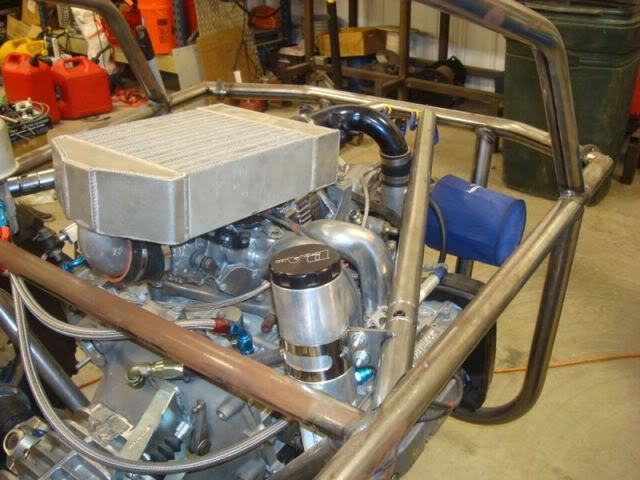
I'm wanting to come to come ride in Wellsville and I heard you need to make your rear cage Ody proof! :shock: So I hope this does the trick! :D

Image

Image

Image

Image

_________________
When in doubt, Hit the Gas!!!!!!!

My build, http://www.woodsbuggy.com/index.php?opt ... =23&t=9147


Last edited by BigScott on Sat Nov 10, 2012 8:30 pm, edited 1 time in total.

Top
 Profile  
 
PostPosted: Fri Aug 05, 2011 9:59 pm 
Offline
BOTM Winner
User avatar

Joined: Mon Apr 30, 2007 3:35 pm
Posts: 3097
Location: Rome Ohio
Ha! Ha! you pretty funnnnnnnny Guy! Looks good. Does your motor drop out from below?

_________________
Water cooled Dry Sumped Subaru Powered Turbo Charged Fuel Injected 2500CC Tank. Oh Rah! He who dies with the most Toys not only wins, He also wears them out!


Top
 Profile  
 
PostPosted: Fri Aug 05, 2011 11:02 pm 
Offline
User avatar

Joined: Wed Feb 14, 2007 11:19 pm
Posts: 202
Location: Indianapolis,IN
Odyknuck wrote:
Ha! Ha! you pretty funnnnnnnny Guy! Looks good. Does your motor drop out from below?


Lol, thanks. The motor slides out the back, I put the inline tube clamps so those braces will come out with the rear cage. Looks good on paper, hope it works the way I want!

_________________
When in doubt, Hit the Gas!!!!!!!

My build, http://www.woodsbuggy.com/index.php?opt ... =23&t=9147


Top
 Profile  
 
Display posts from previous:  Sort by  
Post new topic Reply to topic  [ 173 posts ]  Go to page Previous  1, 2, 3, 4, 5, 6, 7  Next

Board index » General » Buggy Builds

All times are UTC - 5 hours [ DST ]


Who is online

Users browsing this forum: No registered users and 45 guests


You cannot post new topics in this forum
You cannot reply to topics in this forum
You cannot edit your posts in this forum
You cannot delete your posts in this forum
You cannot post attachments in this forum

Search for:
Jump to:  
Powered by phpBB® Forum Software © phpBB Group