It is currently Sat Apr 27, 2024 4:47 am

Board index » General » Buggy Builds

All times are UTC - 5 hours [ DST ]


Post new topic Reply to topic  [ 93 posts ]  Go to page 1, 2, 3, 4  Next
Author Message
 Post subject: 
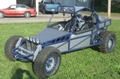
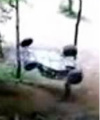
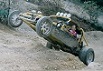
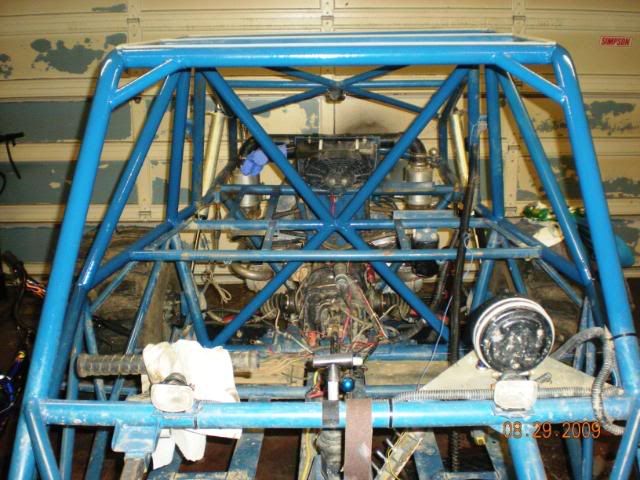
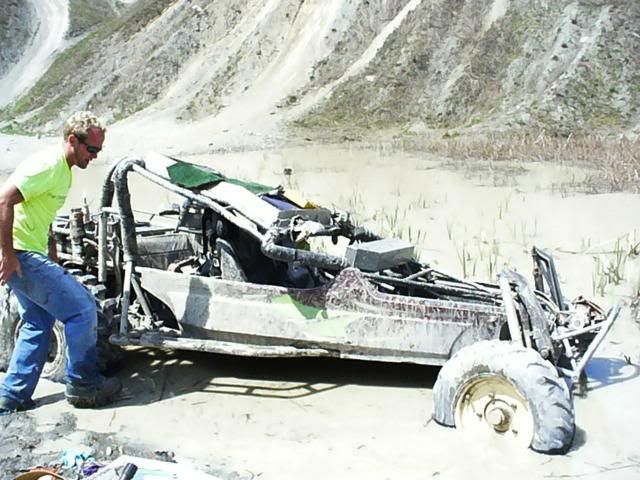
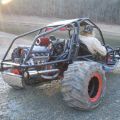
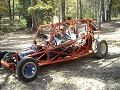
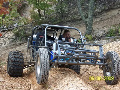
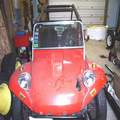
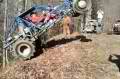
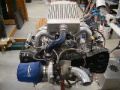
Oddpowers Warrior build
PostPosted: Wed Jan 20, 2010 7:27 am 
Offline
User avatar

Joined: Tue May 05, 2009 9:43 am
Posts: 102
Location: Pendleton, IN
Last Wednesday I piced up a knock down Warrior kit from Davis Racing. Hopfully this will be a quick build, as I don't want to miss any riding time come warmer weather. I'll be steeling a few parts from my current buggy, but i'm going to try to keep it as complete as possible. (for Odd Jr.)
Image
Heres my current buggy. heres my knock down kit when I picked it up.
Image
I dindn't get much done Wednesday but Thursday I got a good start on it.
Image
Image
Image
Image
I just set the rear hoop supports in place cause I'm going to do a double roll bar, and truck back.
Image
Image
Image
Image
I didn't buy the duoble hoop, and truck back kit. I decided to make my own.
More later.


Top
 Profile  
 
PostPosted: Wed Jan 20, 2010 7:32 am 
Offline
User avatar

Joined: Tue May 05, 2009 9:43 am
Posts: 102
Location: Pendleton, IN
It appears I have done something wrong. My pics are being cut in half.

Got the floor cut over the week end and a few more things done. Had to rob the front beam of the old buggy.

Image
Image
Image


Top
 Profile  
 
PostPosted: Wed Jan 20, 2010 7:37 am 
Offline
User avatar

Joined: Tue May 05, 2009 9:43 am
Posts: 102
Location: Pendleton, IN
Last night I got one of the trailing arms one and a shock mounted. I sill have to box the other stock arm. Go a couple gussets put in. I found some cheap lights at Mejyer, i'm going to use. Also got my race brace in.

Image
Image

If anyone can help with my picture problem let me know. :oops:


Top
 Profile  
 
PostPosted: Wed Jan 20, 2010 7:57 am 
Offline
Global moderator
User avatar

Joined: Wed May 30, 2007 2:01 pm
Posts: 5137
Location: Hazel Green, Alabama
Your buggy is coming along nicely,,,you must have a lot of pride in it. keep the pics coming 8)

_________________
Image If your clutch ain't slippin,, you probably got it adjusted right!!!!!


Top
 Profile  
 
PostPosted: Wed Jan 20, 2010 8:49 am 
Offline
WoodsBuggy Addict
User avatar

Joined: Tue Jan 08, 2008 8:53 pm
Posts: 3056
Location: Atlanta, GA
Great Job... You have got more finished in a few days than I can get finished in a few months...

_________________
Woodsbuggy forum is now on the Tapatalk Mobile app... (iPhone, iPad and Android devices)


Top
 Profile  
 
PostPosted: Wed Jan 20, 2010 9:18 am 
Offline
User avatar

Joined: Fri Dec 28, 2007 3:44 pm
Posts: 976
Location: franklin indiana
Wow!!!! look at you go troy, congrats on the new rail. :D i cant wait to put some red on it. :wink:

_________________
Air cooled forever,i hate rusty tools!!!!!!!


Top
 Profile  
 
PostPosted: Wed Jan 20, 2010 9:59 am 
Offline
WoodsBuggy Addict
User avatar

Joined: Wed Feb 07, 2007 4:21 pm
Posts: 1560
Location: Elyria, Ohio
Looks good. Don't forget the X brace.

Change your picture size to 640x480 on photobucket and that will solve the problem.


Top
 Profile  
 
PostPosted: Wed Jan 20, 2010 10:18 am 
Offline
User avatar

Joined: Wed Feb 11, 2009 1:54 am
Posts: 690
Location: Girard, Ohio
hillaholic wrote:
Looks good. Don't forget the X brace.

Change your picture size to 640x480 on photobucket and that will solve the problem.


Click edit on a pic then resize LARGE (640x480) then save a copy. You will solve the problem.

Buggy's coming along great.

_________________
Image


Top
 Profile  
 
PostPosted: Wed Jan 20, 2010 10:45 am 
Offline
User avatar

Joined: Tue May 05, 2009 9:43 am
Posts: 102
Location: Pendleton, IN
Thanks for the possitive comments guys.

Quote:
Don't forget the X brace.

What x brace are you talking about? Cause I do not know where to put one in. This is my first build. I bought my other one as it is. (except a few mods)

I think I screwed up puting the rear torsion in. The instructions said lay it flat on the floor and space the frame up 2.5" then butt the torsion up to it and weld it on. This is what I did, but it looks like the trans is tilted down in the front. I put a makeshift shifter rod on it and to the shift box and the shift rod does not run parralell to the frame, and its a bus trans and they say the shift box will have to be spaced up 2.5 inches over where it mounts for a sedan trans. I will only get mine to come up about .75"
Any Ideas? Did I put the torsion in wrong? :oops:

Odd


Top
 Profile  
 
PostPosted: Wed Jan 20, 2010 11:18 am 
Offline
WoodsBuggy Addict
User avatar

Joined: Wed Feb 07, 2007 4:21 pm
Posts: 1560
Location: Elyria, Ohio
An X brace on the back roof bars and try to run it to the torsion.

Something like this
Image

So the roof won’t fold easily like Bills did
Image


Top
 Profile  
 
PostPosted: Wed Jan 20, 2010 11:49 am 
Offline
User avatar

Joined: Wed Feb 11, 2009 1:54 am
Posts: 690
Location: Girard, Ohio
I forgot the most important step to resizing photos. You have to put the new image code for the resized pics in your post in place of the old ones unless you choose to replace the original photo during editing. Then you dont have to change anything.

_________________
Image


Top
 Profile  
 
PostPosted: Wed Jan 20, 2010 12:04 pm 
Offline
WB Videographer
User avatar

Joined: Thu Jan 25, 2007 10:31 pm
Posts: 675
Location: Somerset, KY
oddpowers wrote:
Thanks for the possitive comments guys.

Quote:
Don't forget the X brace.

What x brace are you talking about? Cause I do not know where to put one in. This is my first build. I bought my other one as it is. (except a few mods)

I think I screwed up puting the rear torsion in. The instructions said lay it flat on the floor and space the frame up 2.5" then butt the torsion up to it and weld it on. This is what I did, but it looks like the trans is tilted down in the front. I put a makeshift shifter rod on it and to the shift box and the shift rod does not run parralell to the frame, and its a bus trans and they say the shift box will have to be spaced up 2.5 inches over where it mounts for a sedan trans. I will only get mine to come up about .75"
Any Ideas? Did I put the torsion in wrong? :oops:

Odd


You probably did the right thing with the torsion, most trans tilt down in the front for more engine clearance in the back. you will have to bend your shift rod.

_________________
Mike
Got Honda?


Top
 Profile  
 
PostPosted: Wed Jan 20, 2010 6:47 pm 
Offline

Joined: Wed Dec 17, 2008 5:56 pm
Posts: 783
Location: mooers hill IN
Looks good :lol: your eng cage looks to fit . so it has to be closes


Top
 Profile  
 
PostPosted: Wed Jan 20, 2010 8:32 pm 
Offline
User avatar

Joined: Wed Jun 11, 2008 7:35 pm
Posts: 274
Location: west kentucky
looking good


Top
 Profile  
 
PostPosted: Wed Jan 20, 2010 8:42 pm 
Offline
WB Contributor
User avatar

Joined: Thu Jul 31, 2008 8:26 pm
Posts: 1125
Location: Gadsden TN
Looks good I could look at buggy builds all day

Keep the pics coming


Top
 Profile  
 
PostPosted: Wed Jan 20, 2010 8:49 pm 
Offline
WoodsBuggy Addict
User avatar

Joined: Tue Jan 08, 2008 8:53 pm
Posts: 3056
Location: Atlanta, GA
Your torsion should be fine. I would mount your shifter were it is comfortable and then fabricate your shifting rod to fit.

_________________
Woodsbuggy forum is now on the Tapatalk Mobile app... (iPhone, iPad and Android devices)


Top
 Profile  
 
PostPosted: Wed Jan 20, 2010 10:48 pm 
Offline
User avatar

Joined: Wed Dec 31, 2008 2:05 pm
Posts: 211
Location: Wilmington, NC
if you can take a look at my build then you can see how i made my shift rod...it uses 2 type1 late couplers and a shortened shiftrod and a couple scrap pieces...its under my venture build near the bottom....

looks like your comming along great though!


Top
 Profile  
 
PostPosted: Thu Jan 21, 2010 3:37 pm 
Offline
User avatar

Joined: Tue May 05, 2009 9:43 am
Posts: 102
Location: Pendleton, IN
Finally got my pics fixed.

Got some more done last night will post some more pics tonight. Hoping to get it on all four wheels by the end of the week end.
Thanx for all the possitive feed back.


Top
 Profile  
 
PostPosted: Thu Jan 21, 2010 5:39 pm 
Offline
User avatar

Joined: Sun Apr 15, 2007 8:22 am
Posts: 352
Location: Zeeland MI
Nice looking build. Thanks Dave T

_________________
RAJAY + SAND = FUN!!! Can we put a turbo on that??*** Hey look in here for more junk.*** http://s119.photobucket.com/albums/o157 ... ndoffroad/


Top
 Profile  
 
PostPosted: Thu Jan 21, 2010 6:22 pm 
Offline
WoodsBuggy Addict
User avatar

Joined: Fri Nov 14, 2008 9:45 pm
Posts: 2226
Location: Boone County West (BY GOD) Virginia
looking good.as fast as your going you'll be riding it soon.chad :mrgreen:

_________________
NOW GAS IT!!!!!


Top
 Profile  
 
PostPosted: Fri Jan 22, 2010 7:30 pm 
Offline
WoodsBuggy Addict
User avatar

Joined: Mon Feb 19, 2007 2:23 pm
Posts: 2039
Location: Central Indiana
Look at you go Troy............ :mrgreen:

Wish I had that ambition sometimes.

_________________
Gary

Turbo VW Sand Racer
Polaris Ranger


"If you don't run into the Devil every once in awhile, you must be going in the same direction!"

Davis Motorsports FaceBook Page


Top
 Profile  
 
PostPosted: Sun Jan 24, 2010 12:34 pm 
Offline
User avatar

Joined: Tue May 05, 2009 9:43 am
Posts: 102
Location: Pendleton, IN
More updates!!

Image
Image

Image

Image
Image
Image

I got my lite bar on. I'm not sure I like the mesh in front of it, but it should keep the limbs from braking my lites. Also got the X-brace done, and one of the sides,(arm rest)

I bought a couple 31" boggers from Bigscott.(very nice guy)

Are the tires to big or is my son to small.......
Image

I also got a once in a life time pic, of a creature that is rarely cought on camera....

Image


Top
 Profile  
 
PostPosted: Sun Jan 24, 2010 12:39 pm 
Offline
WoodsBuggy Addict
User avatar

Joined: Mon Oct 27, 2008 9:12 pm
Posts: 3891
Location: Fort Wayne, IN WoodsBuggy - NOMAD Chapter
Lovin the new Buggy Troy. Tell Jimmy he looks better in the camo LMAO!

_________________
[url=http://www.TickerFactory.com/]
Image
[/url]


Top
 Profile  
 
PostPosted: Sun Jan 24, 2010 10:11 pm 
Offline
User avatar

Joined: Sat Mar 31, 2007 4:24 pm
Posts: 774
Location: Okeana, Ohio
Build looks good, and I'm not just saying that since that guy is packin'. :D

_________________
A broken clock is right two times a day.


Top
 Profile  
 
PostPosted: Tue Jan 26, 2010 12:24 am 
Offline
User avatar

Joined: Wed Feb 14, 2007 11:19 pm
Posts: 202
Location: Indianapolis,IN
A. Cole wrote:
Build looks good, and I'm not just saying that since that guy is packin'. :D


Adam, you should thank Troy for buying my 31" boggers so I could buy your 33's :lol: The rail is looking good Troy.

_________________
When in doubt, Hit the Gas!!!!!!!

My build, http://www.woodsbuggy.com/index.php?opt ... =23&t=9147


Top
 Profile  
 
Display posts from previous:  Sort by  
Post new topic Reply to topic  [ 93 posts ]  Go to page 1, 2, 3, 4  Next

Board index » General » Buggy Builds

All times are UTC - 5 hours [ DST ]


Who is online

Users browsing this forum: No registered users and 30 guests


You cannot post new topics in this forum
You cannot reply to topics in this forum
You cannot edit your posts in this forum
You cannot delete your posts in this forum
You cannot post attachments in this forum

Search for:
Jump to:  
Powered by phpBB® Forum Software © phpBB Group