It is currently Sat Apr 27, 2024 5:03 pm

Board index » General » Buggy Builds

All times are UTC - 5 hours [ DST ]


Post new topic Reply to topic  [ 71 posts ]  Go to page Previous  1, 2, 3
Author Message
 Post subject: Re: Hunter's Buggy Build
PostPosted: Thu Jan 17, 2013 8:49 pm 
Offline
User avatar

Joined: Mon Oct 31, 2011 5:24 pm
Posts: 263
Location: Trevorton,Pa
Image
Image
Image
Image
Image
Image
Image
Image
Image
Image
Image
Image
Image
Image
Image
Image
Image

Photobucket changed their stuff so i have no idea how to change pic sizes. :/ But you get the idea, sexy new engine. :mrgreen:

_________________
WTFO
We ride together, We die together, Bad Boys for Life
Loud pipes save lives.


Top
 Profile  
 
 Post subject: Re: Hunter's Buggy Build
PostPosted: Thu Jan 17, 2013 8:55 pm 
Offline
WB Contributor
User avatar

Joined: Wed Nov 30, 2011 6:16 pm
Posts: 1003
Location: columbus, OH
tell your mom youll move the engine as soon as she takes the christmas decorations down :lol:

_________________
If it ain't broke ill fix that


Top
 Profile  
 
 Post subject: Re: Hunter's Buggy Build
PostPosted: Thu Jan 17, 2013 11:14 pm 
Offline
User avatar

Joined: Thu Oct 11, 2012 2:26 pm
Posts: 226
Location: Winchester,KY
thats a clean looking engine ! congrats!


Top
 Profile  
 
 Post subject: Re: Hunter's Buggy Build
PostPosted: Fri Jan 18, 2013 8:43 pm 
Offline
User avatar

Joined: Mon Oct 31, 2011 5:24 pm
Posts: 263
Location: Trevorton,Pa
Lol the tree is comming down tonight. And she laughed also.

Thanks, full rebuild! 8)

_________________
WTFO
We ride together, We die together, Bad Boys for Life
Loud pipes save lives.


Top
 Profile  
 
 Post subject: Re: Hunter's Buggy Build
PostPosted: Fri Jan 18, 2013 10:01 pm 
Offline
WB Contributor
User avatar

Joined: Thu Sep 06, 2012 2:23 pm
Posts: 1212
Location: Chattanooga Tennessee
Hunter nice to see the engine complete. I don't want to rain on the parade but I would suggest going to a eight dowel on the crank, I believe it can be done assembled. At the very least invest in an aftermarket chromoly oversized gland.

All suggestion are applicable if you are going to race this engine. Small investments that will save your crank

_________________
Water Cooled Consortium, Chairman of the Build (Former AC purist)


Top
 Profile  
 
 Post subject: Re: Hunter's Buggy Build
PostPosted: Fri Feb 01, 2013 11:15 pm 
Offline
User avatar

Joined: Mon Oct 31, 2011 5:24 pm
Posts: 263
Location: Trevorton,Pa
I'm going to check into that Red Barron. Thanks for the tip.

Alright got my chromoly arms and my stock front arms and should be picking up my mounts and drums this weekend.
+1 length x stock width arms
Gota get my pass. arm off and my front spring packs out, also need to pull my seats. The buggy will be going in to school on Tuesday to have my old torsion cut out and my new one put in. Does anyone have any tips on that? My tubes are about about half an inch over the inside of the torsion. I'm just going to shave down the outside of the tubes and make it fit. I plan on cutting it out with a grinding wheel so i can minimize the kerf since the old torsion was actually larger than the new one. Not sure how well that's going to work but i will get it to fit and make sure its straight. And weld and gusset the shit out of it. I know to check the angle of the torsion on spring plate on the top and bottom. (Might just use a piece of cardboard to get the angle instead of an angle finder because i don't have one) Once i have that i can just rotate the torsion until its in at the correct angle according to the cardboard. And for placing the mounts i just plan of throwing my old bushings and bolts on the new mounts and bolting the arm to the spring plate and just tacking it and making sure its level. Then just rip the arm off and weld her in.

_________________
WTFO
We ride together, We die together, Bad Boys for Life
Loud pipes save lives.


Top
 Profile  
 
 Post subject: Re: Hunter's Buggy Build
PostPosted: Sat Feb 02, 2013 12:06 am 
Offline
WB Contributor
User avatar

Joined: Wed Nov 30, 2011 6:16 pm
Posts: 1003
Location: columbus, OH
i gotta say great job. ive never seen a fella of your age be so forward thinking and maticulus not to mention stick with a project so long. cant wait to see the cheese on your face when you get it done. hell get this thing done and i might come see you race it.

_________________
If it ain't broke ill fix that


Top
 Profile  
 
 Post subject: Re: Hunter's Buggy Build
PostPosted: Sat Feb 02, 2013 5:23 am 
Offline
User avatar

Joined: Mon Oct 31, 2011 5:24 pm
Posts: 263
Location: Trevorton,Pa
I really had my head set on a buggy that i can race. Honestly without this forum i think i would have just given up, i have gotten so much information offa here. Anytime i needed help someone was always here. I might have costed x3's what i though it would and three times as long as what i thought but i think im going to be a serious contender in stock buggy. Thank you hp freak, i just use the knowledge i have and try and make shit happen. Fill in the blanks as you go. I just went to my excell and damn.... I didn't realize i had this much into it so far. :mrgreen: :shock: And i didn't even get my fox shocks yet. 8)

_________________
WTFO
We ride together, We die together, Bad Boys for Life
Loud pipes save lives.


Top
 Profile  
 
 Post subject: Re: Hunter's Buggy Build
PostPosted: Fri Feb 15, 2013 1:58 pm 
Offline
User avatar

Joined: Mon Oct 31, 2011 5:24 pm
Posts: 263
Location: Trevorton,Pa
Alright got the buggy in my welding shop. Spent 2 days filling tiny 1/8" drilled holes in the bottom tubes. :?: There was more than 50 and grind em flush. :shock: Also went over all the bad welds... I don't think there was a good weld on it. I did not cut out the torsion on jack stands. When i did it i flipped it on its lid and cut it out. I figure if you were going from a car torsion to a bus torsion it would make sense but i figured whats the point? Its already smaller than the existing tubing. So i chopped the old tubing back a few inches and used an insert and just brought out new tubing and notched it. I did that with all 4 of the bottom tubes coming from the front. I made sure it was level and its down to the 1/32" square wise from the beam. Well now i have my x brace and my tube comming from my rear cage, and also the one on the rear hoop around the driver/pass compt. When the buggy was built the guy ran all 3 together into a "tree". Since i don't have the time to deal with all that shit, im going to do it my way. Simpler, easier and stronger.
Image

Okay see the tube where the rear shock mt is? Now follow it to the curve by the tree bar. See those 2 parellel bends? There is actually one below it also that did the same bend right into the torsion. I cut the bottom one so its behind the bend. I can reuse this bend now and actually turned it downward so the bend is going to butt right into the new torsion. Now all i gota do it notch it where i need it and bring down the x brace and the rear hoop and notch those. I cut out the tubes that held my tranny and my engine because they were beat to he**. Seriously, they took a ton of abuse. Once my torsion is solid welded in im going to use 2" square tubing for the new "pan" since i have a ton of it in school and its going to be stronger. It's going to have a flat surface to glide over the rocks instead of denting so easily. Just going to use my old mounts from the old "pan". I need to get new pics up.

_________________
WTFO
We ride together, We die together, Bad Boys for Life
Loud pipes save lives.


Top
 Profile  
 
 Post subject: Re: Hunter's Buggy Build
PostPosted: Wed Feb 27, 2013 9:53 pm 
Offline
User avatar

Joined: Mon Oct 31, 2011 5:24 pm
Posts: 263
Location: Trevorton,Pa
Torsion welded in and level. Also square down to the 1/8". Got my arm mounts done today and had to drill my new arms since people don't know how to drill holes correctly. Gota get on my tranny pan tomorrow and my mounts. Then my seat mounts, solid 3/16 plate welded in and its comming back home.

_________________
WTFO
We ride together, We die together, Bad Boys for Life
Loud pipes save lives.


Top
 Profile  
 
 Post subject: Re: Hunter's Buggy Build
PostPosted: Tue Jul 30, 2013 11:25 am 
Offline
User avatar

Joined: Mon Oct 31, 2011 5:24 pm
Posts: 263
Location: Trevorton,Pa
Phew alot has gone on and finished since i last updated my built. Can someone explain to me how to post pictures again? I used to use pb but since it was making the pictures really and you stopped being able to change the size i heard we are using the gallery now. Well she was damn near ready to race on may 4th. That was the first race. I fell asleep at the wheel on my way back from my brother in laws at like 5 am may 4th which was raceday. Had 5 hours of sleep in 3 days we were pushing that hard to get the buggy done. Everyone had alot of time in this with me, my co pilot dalton, his brother chris, my buddy zach, and even my mom making us food while we were in the garage. Well i totaled my truck and i will post up some pictures then, i have been meaning to for awhile. Well we got everything semi decent for the June race and thought everything was going to go smoothly. Well got a little into the race bumped this guy in fronta me with my front left and snapped steering. We had to orginally rig it using a 5/8 heim with a 5/8 thread to a 3/4" tie rod so we had to weld the nut to the tie rod so we could still adjust the steering. Well when we welded it, it was only tacked so it broke. (Completely forgot about it and missed it in the checks) Well we just raced in the July race and broke again on the first lap. Got pushed full speed 2nd gear super beetle tran's into a tree by a 4x4. Snapped my rack clean in half, bent my beam, front arms and front frame. We hit so hard the distributor cap flew off. Well now its time to dump some money into my front end and we are probably going to skip the september race so i can get some good quality parts.

Thinking about running coilovers in the front while, its an upgrade for the torsion leafs and i hear they are amazingly smooth. And i figure while cutting the frame we might as well make the towers all at once and do it so i don't have to do it a little bit later.
Also going to upgrade my arms and spindles to foddrill and go with a 7/8th LP.
New Saco rack with new tie rods and greasable international tie rod ends all the way around.
Going to need a new beam.
Also blew my tranny again. (49 teeth this time so its time to bump up to a 3 rib)
I need to ditch these shitty stock petals. I have to stretch and they are just a little bit too far away for me to be comfortable with them. They are welded to frame so i i may as well say screw it and upgrade them to cnc's or jamar and mount them correctly unlike the last dumbass to own this frame.
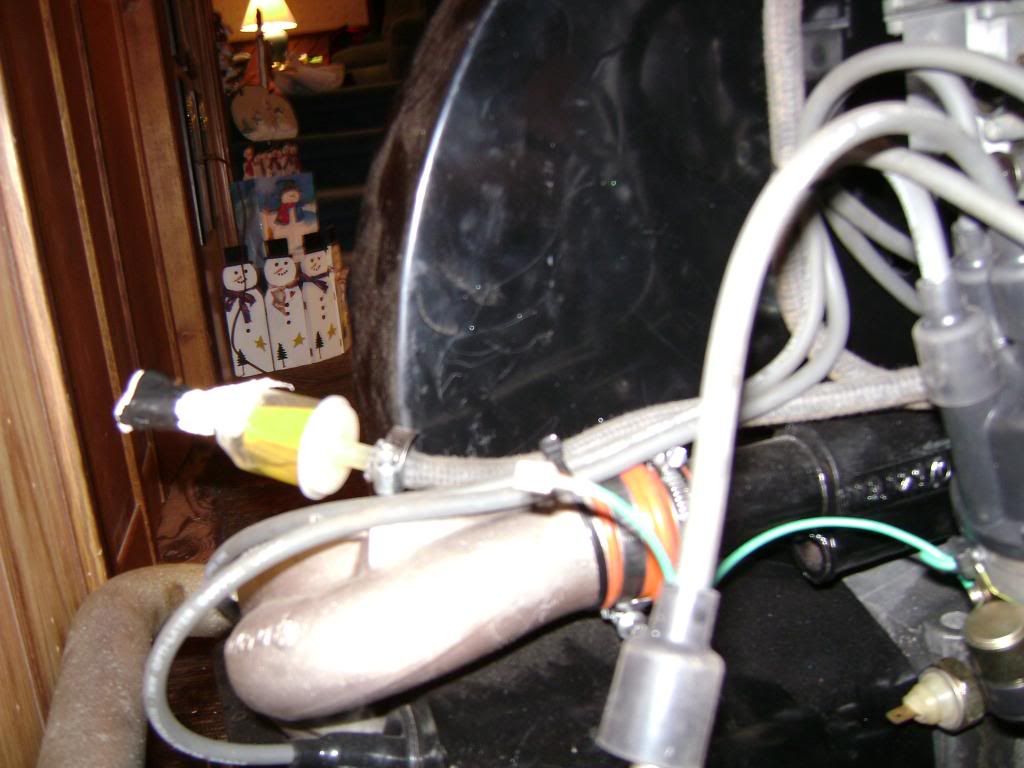
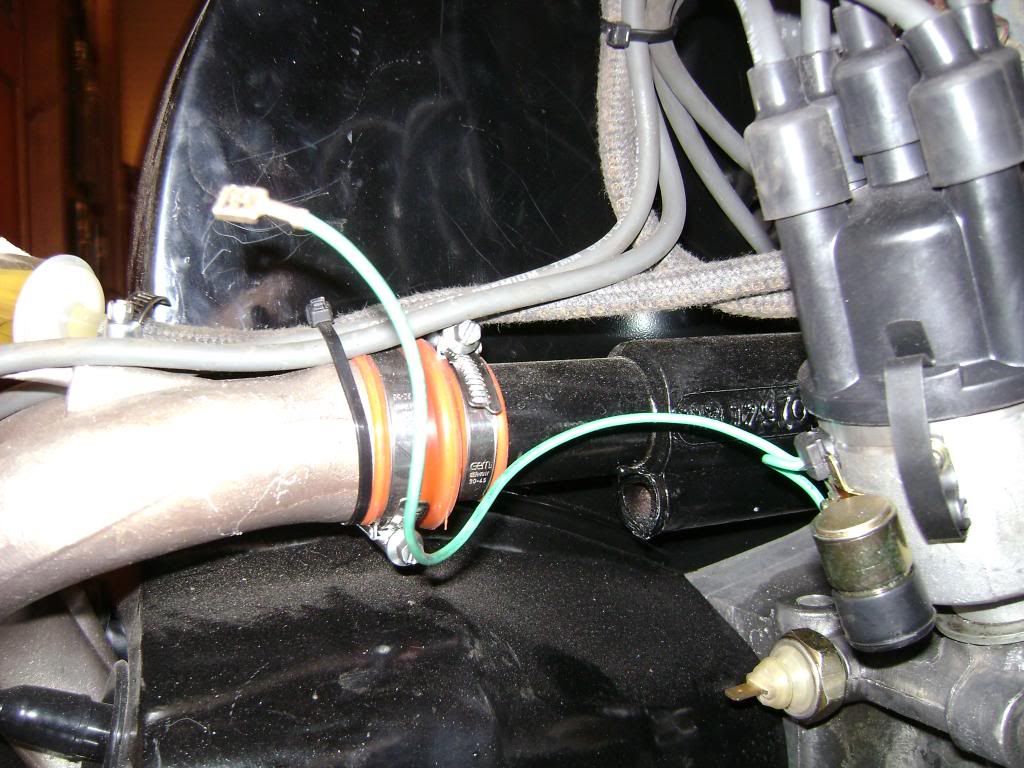
Then just some small stuff like going over my wiring and replacing it will all new wire. I'm not happy with the current slice and splice method used on the old harness that came with the buggy. :x
Would also like to have my 2 idiot lights for myself. Then i would like to have an oil temp and oil pressure guage in the middle for my co pilot to monitior. I came across a cheap 10" fan so i was thinking about mounting that to my temp sender to kick on at a certain temp for extra cooling. And mounting it to a larger upgraded oil cooler. Mine is already an upgraded one but its too narrow to fit the fan so i just want to be extra safe for the next races when its hotter than hell out and everyone else is over heating i can just chugg on by! 8)
But i think thats about the list of to do's. The next race won't be until May of next year so i have a good bit of time to save up some big money and get my parts bought and actually get to test my buggy out. I need to check with an offical though as far as the coils but i don't think it will be a problem.

_________________
WTFO
We ride together, We die together, Bad Boys for Life
Loud pipes save lives.


Top
 Profile  
 
 Post subject: Re: Hunter's Buggy Build
PostPosted: Tue Jul 30, 2013 11:44 am 
Offline
User avatar

Joined: Fri Dec 28, 2007 3:44 pm
Posts: 976
Location: franklin indiana
tinypic.com easiest way ive found to load pics

_________________
Air cooled forever,i hate rusty tools!!!!!!!


Top
 Profile  
 
 Post subject: Re: Hunter's Buggy Build
PostPosted: Tue Jul 30, 2013 2:23 pm 
Offline
WoodsBuggy Addict
User avatar

Joined: Fri Nov 30, 2007 4:03 pm
Posts: 3181
Location: leeds alabama
Photobucket is the best way to me

_________________
Image

I DO NOT FREE BASE COCAINE


Top
 Profile  
 
 Post subject: Re: Hunter's Buggy Build
PostPosted: Tue Jul 30, 2013 3:57 pm 
Offline
WoodsBuggy Addict
User avatar

Joined: Tue Jan 08, 2008 8:53 pm
Posts: 3056
Location: Atlanta, GA
If you use the gallery,


Posted using the WoodsBuggy Mobile App

_________________
Woodsbuggy forum is now on the Tapatalk Mobile app... (iPhone, iPad and Android devices)


Top
 Profile  
 
 Post subject: Re: Hunter's Buggy Build
PostPosted: Tue Jul 30, 2013 8:02 pm 
Offline
User avatar

Joined: Mon Oct 31, 2011 5:24 pm
Posts: 263
Location: Trevorton,Pa
Image

This is a picture in Feb when i had it out at the welding shop in tech. I took welding. Cut the bus torsion out and put in a car torsion. When you have the proper tools its not too hard to do.

_________________
WTFO
We ride together, We die together, Bad Boys for Life
Loud pipes save lives.


Top
 Profile  
 
 Post subject: Re: Hunter's Buggy Build
PostPosted: Fri Aug 02, 2013 9:51 pm 
Offline
User avatar

Joined: Mon Oct 31, 2011 5:24 pm
Posts: 263
Location: Trevorton,Pa
Alright having a hell of a time with pictures, so if you want to see them look on facebook. They are all on there. I don't have time for this shit. Photobucket used to work great, was fast and easy. Until they updated it and you could no longer change the size of the pics to fit this webpage. That gallery at the top is a huge pain and i don't have time for it.

_________________
WTFO
We ride together, We die together, Bad Boys for Life
Loud pipes save lives.


Top
 Profile  
 
 Post subject: Re: Hunter's Buggy Build
PostPosted: Fri Aug 02, 2013 10:01 pm 
Offline
User avatar

Joined: Fri Dec 28, 2012 4:05 am
Posts: 473
Location: connellsville, pa
How's ppl that want to see it that don't have Facebook supposed to see??


Posted using the WoodsBuggy Mobile App

_________________
#If the throttle isn't floored, Your NOT havin FUN!!!!#


Top
 Profile  
 
 Post subject: Re: Hunter's Buggy Build
PostPosted: Sun Aug 11, 2013 12:54 pm 
Offline
WoodsBuggy Addict
User avatar

Joined: Wed Feb 07, 2007 4:21 pm
Posts: 1560
Location: Elyria, Ohio
You can go to settings in photo bucket and set the size. Then any picture you upload will be the correct size.

Posted using the WoodsBuggy Mobile App


Top
 Profile  
 
 Post subject: Re: Hunter's Buggy Build
PostPosted: Sun Aug 11, 2013 1:03 pm 
Offline
WoodsBuggy Addict
User avatar

Joined: Wed Feb 07, 2007 4:21 pm
Posts: 1560
Location: Elyria, Ohio
Posted using the WoodsBuggy Mobile App


Attachments:
1376240608478.jpg
1376240608478.jpg [ 41.51 KiB | Viewed 4794 times ]
Top
 Profile  
 
 Post subject: Re: Hunter's Buggy Build
PostPosted: Sun Aug 11, 2013 8:52 pm 
Offline
WoodsBuggy Addict
User avatar

Joined: Fri Nov 30, 2007 4:03 pm
Posts: 3181
Location: leeds alabama
Photobicket still works the same its how I post all my stuff also the top gallery os even more simple you just upload them right from your pc

_________________
Image

I DO NOT FREE BASE COCAINE


Top
 Profile  
 
 Post subject: Re: Hunter's Buggy Build
PostPosted: Thu Aug 15, 2013 11:50 am 
Offline

Joined: Fri Aug 03, 2012 6:11 pm
Posts: 54
Location: Cincinnati ohio
looking good man keep it up


Top
 Profile  
 
Display posts from previous:  Sort by  
Post new topic Reply to topic  [ 71 posts ]  Go to page Previous  1, 2, 3

Board index » General » Buggy Builds

All times are UTC - 5 hours [ DST ]


Who is online

Users browsing this forum: No registered users and 49 guests


You cannot post new topics in this forum
You cannot reply to topics in this forum
You cannot edit your posts in this forum
You cannot delete your posts in this forum
You cannot post attachments in this forum

Search for:
Jump to:  
Powered by phpBB® Forum Software © phpBB Group