It is currently Sat Jun 15, 2024 11:40 pm

Board index » General » Buggy Builds

All times are UTC - 5 hours [ DST ]


Post new topic Reply to topic  [ 455 posts ]  Go to page Previous  1 ... 10, 11, 12, 13, 14, 15, 16 ... 19  Next
Author Message
 Post subject: Re: Rail Buggy Upgrade
PostPosted: Thu Dec 13, 2012 2:24 pm 
Offline

Joined: Sun Jan 08, 2012 4:37 pm
Posts: 474
Location: Southern Indiana
you think 5 inches is far enough from the drivers head? I am not sure how much to expect the seat to flex? I can do as little as you think... I think I will shoot for 3 inches from the seat back... unless you think otherwise...


Top
 Profile  
 
 Post subject: Re: Rail Buggy Upgrade
PostPosted: Thu Dec 13, 2012 2:52 pm 
Offline

Joined: Sun Jan 08, 2012 4:37 pm
Posts: 474
Location: Southern Indiana
Or what about this design... Instead of running the X brace up and just behind the hoop... what about running it to the intersecting tube and then triangulating that to the center of the hoop? Or am I starting to over think this? I can just do the 3 inches behind the seats... just a thought... once I make the first cut I will be stuck and not have any other tube to cut.


This is sort of what I mean:

Image

Image

OR just stick to 3 inch behind the seat:

Image

Image


Top
 Profile  
 
 Post subject: Re: Rail Buggy Upgrade
PostPosted: Thu Dec 13, 2012 3:44 pm 
Offline
WB Contributor
User avatar

Joined: Thu Sep 06, 2012 2:23 pm
Posts: 1212
Location: Chattanooga Tennessee
I would say three to five inches is plenty. I would invest in some roll bar padding just in case.

_________________
Water Cooled Consortium, Chairman of the Build (Former AC purist)


Top
 Profile  
 
 Post subject: Re: Rail Buggy Upgrade
PostPosted: Thu Dec 13, 2012 3:47 pm 
Offline

Joined: Sun Jan 08, 2012 4:37 pm
Posts: 474
Location: Southern Indiana
So you think I should just do the X brace and not include the extra tubes tied to the top hoop tube... I guess if I just do the X brace I may have the tube I need for the windshield brace... still thinking...


Top
 Profile  
 
 Post subject: Re: Rail Buggy Upgrade
PostPosted: Thu Dec 13, 2012 4:07 pm 
Offline
WB Contributor
User avatar

Joined: Thu Sep 06, 2012 2:23 pm
Posts: 1212
Location: Chattanooga Tennessee
I think you will be fine with the X as you have it shown. with the shock bracing and triangulation it should be very strong. Then take some short pieces and brace the wind shield area. Just make sure you can wriggle out easy if you put it in a lake. Yes it happens I was there.

_________________
Water Cooled Consortium, Chairman of the Build (Former AC purist)


Top
 Profile  
 
 Post subject: Re: Rail Buggy Upgrade
PostPosted: Thu Dec 13, 2012 4:14 pm 
Offline

Joined: Sun Jan 08, 2012 4:37 pm
Posts: 474
Location: Southern Indiana
Man that must have been an interesting trip ;)

Thanks In about 2 hours or so I am going to cut it up and try to get it tacked at least... Pic's will follow when I have something to show...


Top
 Profile  
 
 Post subject: Re: Rail Buggy Upgrade
PostPosted: Thu Dec 13, 2012 5:04 pm 
Offline
WB Contributor
User avatar

Joined: Thu Sep 06, 2012 2:23 pm
Posts: 1212
Location: Chattanooga Tennessee
I am going to try to dig up some pictures. My best friend rolled his single seat car down an embankment into a lake. I was right behind him, we were rat racing around a lake, unfortunately the trail we usually raced around was under about six feet of water. I slid to a stop about four feet from the water. I was lucky I could have joined him.

We laughed a lot once we were sure he was ok.

_________________
Water Cooled Consortium, Chairman of the Build (Former AC purist)


Top
 Profile  
 
 Post subject: Re: Rail Buggy Upgrade
PostPosted: Thu Dec 13, 2012 7:22 pm 
Offline
Master fabricator
User avatar

Joined: Fri Mar 02, 2007 11:55 pm
Posts: 2304
Location: S.W. Pa. Wellsville Water Cooled Chapter
In order for a diagonal to work it has to be in plane with the area it is diagonal to. Since it can't be in plane, because of head room, keep it as close to it as possible. Because you have extra structure, the shock mounts, in that general area I think you will be alright. Just stay inside that area made from the shock mount.
Do it like these............
myrddin wrote:
OR just stick to 3 inch behind the seat:

Image

Image

_________________
Of all the things I've lost, I miss my mind the most.
M
A
G
A


Top
 Profile  
 
 Post subject: Re: Rail Buggy Upgrade
PostPosted: Thu Dec 13, 2012 8:03 pm 
Offline

Joined: Sun Jan 08, 2012 4:37 pm
Posts: 474
Location: Southern Indiana
Thanks Mike... I went with 4 inches to be safe it put me inside the shock area and after seeing it I think it will be fine... Not exactly what I wanted but I gotta deal with what I have... This is where I am as of now:

Image

Image

Image

Image

Image

Image

Image

I ran out of cutting wheels or I would have tacked in the windshield brace as well... I am also going to add a brace for the bump stop and I might add a few more (depends on what I have left for tubing... I can come back and do more later too... I noticed I still have the center upright (the hoop) that is close to the driver and passenger head... its about 3 inches or a little less (hard to measure myself sitting there... I will pad it up and hope for the best. all in all I can see it coming together... not as well as I hoped but with the tools I have and what I have to work with I am happy so far...

Question, do I need a tube right behind the seats... or is it OK to have some room between them and the X brace (before I had some square stock that butted up to the seats with my seat belt tabs... I can add tabs to the X brace... or order get some tubing to go right behind the seat like before... I still need to drive out to find that local place...


Top
 Profile  
 
 Post subject: Re: Rail Buggy Upgrade
PostPosted: Thu Dec 13, 2012 8:31 pm 
Offline
Master fabricator
User avatar

Joined: Fri Mar 02, 2007 11:55 pm
Posts: 2304
Location: S.W. Pa. Wellsville Water Cooled Chapter
You will need some place for the shoulder harness to bolt to

_________________
Of all the things I've lost, I miss my mind the most.
M
A
G
A


Top
 Profile  
 
 Post subject: Re: Rail Buggy Upgrade
PostPosted: Thu Dec 13, 2012 8:56 pm 
Offline
WB Contributor
User avatar

Joined: Thu Sep 06, 2012 2:23 pm
Posts: 1212
Location: Chattanooga Tennessee
I always like to have a seat bar behind the seat as reinforcement for that extra hard impact. But I am a big guy. :D

_________________
Water Cooled Consortium, Chairman of the Build (Former AC purist)


Top
 Profile  
 
 Post subject: Re: Rail Buggy Upgrade
PostPosted: Thu Dec 13, 2012 9:00 pm 
Offline
WB Contributor

Joined: Mon Apr 28, 2008 1:49 pm
Posts: 1107
Location: cinti,oh
x brace looks good ,thats what i was thinking as far as placement. and i would put the bar behind the seats rite how it was before, and mount your belt tabs to it!

_________________
ANTI- antifreeze!!!!!!


Top
 Profile  
 
 Post subject: Re: Rail Buggy Upgrade
PostPosted: Thu Dec 13, 2012 9:39 pm 
Offline

Joined: Sun Jan 08, 2012 4:37 pm
Posts: 474
Location: Southern Indiana
Thanks guys... I will add the seat brace back... Will call the local place in the morning...


Top
 Profile  
 
 Post subject: Re: Rail Buggy Upgrade
PostPosted: Thu Dec 13, 2012 11:20 pm 
Offline

Joined: Tue Jul 12, 2011 7:16 pm
Posts: 711
Location: hayden, al
i used to have my windshield bars in that exact location and it sucks.. pain in the ass getting in and out of. i ran them all the way to the top, just kinda followed the rake of the windshield down to where it was back about 6'' at the bottom. i have pics of it on here, i will try to post it here..

_________________
LEGALIZE BLUEGRASS!!!

Save a tree... eat a Beaver


Top
 Profile  
 
 Post subject: Re: Rail Buggy Upgrade
PostPosted: Thu Dec 13, 2012 11:34 pm 
Offline

Joined: Tue Jul 12, 2011 7:16 pm
Posts: 711
Location: hayden, al
http://www.woodsbuggy.com/index.php?opt ... =5&t=13166

_________________
LEGALIZE BLUEGRASS!!!

Save a tree... eat a Beaver


Top
 Profile  
 
 Post subject: Re: Rail Buggy Upgrade
PostPosted: Thu Dec 13, 2012 11:44 pm 
Offline

Joined: Sun Jan 08, 2012 4:37 pm
Posts: 474
Location: Southern Indiana
Nice buggy.... Now you have me wondering... I need to try to get in and out a few times... Thanks for the pic...


Top
 Profile  
 
 Post subject: Re: Rail Buggy Upgrade
PostPosted: Fri Dec 14, 2012 12:03 am 
Offline

Joined: Tue Jul 12, 2011 7:16 pm
Posts: 711
Location: hayden, al
myrddin wrote:
Nice buggy.... Now you have me wondering... I need to try to get in and out a few times... Thanks for the pic...


no problem.. i originally had mine there for strength but didnt consider getting in and out until it had already been welded solid :oops: we changed it to what you see and i flipped it and ALL the weight landed on that front corner of the windshield and the beam. it KO'd the front but the cab didnt budge

_________________
LEGALIZE BLUEGRASS!!!

Save a tree... eat a Beaver


Top
 Profile  
 
 Post subject: Re: Rail Buggy Upgrade
PostPosted: Fri Dec 14, 2012 12:18 am 
Offline
WoodsBuggy Addict
User avatar

Joined: Fri Nov 30, 2007 4:03 pm
Posts: 3181
Location: leeds alabama
here is how i did mine it use to be like you are talking and it was a pain to get in so i cut it out and put a new one in like this also the slight bend makes it a little more room

Image

Image

_________________
Image

I DO NOT FREE BASE COCAINE


Top
 Profile  
 
 Post subject: Re: Rail Buggy Upgrade
PostPosted: Fri Dec 14, 2012 8:31 am 
Offline

Joined: Sun Jan 08, 2012 4:37 pm
Posts: 474
Location: Southern Indiana
Jesse I like your design too...I also like the idea of the brace you put at the bottom of the windshield... I don't have a bender though... I need one :) but I might have to come back and do some after thoughts...

nice buggy


Top
 Profile  
 
 Post subject: Re: Rail Buggy Upgrade
PostPosted: Fri Dec 14, 2012 1:20 pm 
Offline

Joined: Sun Jan 08, 2012 4:37 pm
Posts: 474
Location: Southern Indiana
Going to try to get the rest cut up tonight... I called local place for tubing... one place has 1.5 095 wall for 70 bucks - 20 feet... The other had a drop of 71 inches and he said (I asked twice) he wanted 129.00 it was 120 wall which is what I like to use... I was like you sure that's right... I could put some square stock back in it but I figure why not add the same I have been using so it all blends... going to hold off for now and just order more tubing in the future... still need some for few other things I want to do...

Pics will follow once I have the bracing cut and tacked... will start to weld up the rear X brace. This weekend I need to pack the CV's and Arm bearings with the grease and try to get some paint on the bare metal... I want to repaint in spring... just want to keep the rust off. I have a long ways to go...

still need wire harness, brake plumbing, fuel plumbing... lighting... and I stopped working on the motor... it needs the valve geometry figured out since I stroked the motor... lots of fun....


Top
 Profile  
 
 Post subject: Re: Rail Buggy Upgrade
PostPosted: Fri Dec 14, 2012 2:33 pm 
Offline
WB Contributor
User avatar

Joined: Thu Sep 06, 2012 2:23 pm
Posts: 1212
Location: Chattanooga Tennessee
The DOM 0.95 wall tubing will be plenty sufficient for bracing and behind the seat. I always use 120 wall ERW tubing for my upper and lower rails and uprights, and cage. The bracing for everything I will use a 1" 0.65 and 1 1/2" 0.95 wall.

I think DOM is great especial for suspension components and items that see high shear loads. But for a play car I don't see and Issue with ERW tubing.

This is my opinion and so far it has worked for all of my endeavors.

_________________
Water Cooled Consortium, Chairman of the Build (Former AC purist)


Top
 Profile  
 
 Post subject: Re: Rail Buggy Upgrade
PostPosted: Fri Dec 14, 2012 3:40 pm 
Offline

Joined: Sun Jan 08, 2012 4:37 pm
Posts: 474
Location: Southern Indiana
Its all good man... I will need more DOM 120 for some things I want to do to the front... and I still need 1 inch for a few locations too... I don't see any reason to hold off completing what I have and coming back to that... as long as my buddy is OK with me holding on to his welder a bit longer... now if he asks for it I will need to wrap it up somehow... I may go ahead and order some to have on hand to be safe... I need to think it over.


Top
 Profile  
 
 Post subject: Re: Rail Buggy Upgrade
PostPosted: Wed Dec 19, 2012 8:10 am 
Offline

Joined: Sun Jan 08, 2012 4:37 pm
Posts: 474
Location: Southern Indiana
OK, I have paint on most things... agn this is what I will call temp paint till I can get some warm weather and sunshine... I need to figure some things out...

What do you think I need to torque these things to:
Torsion pivot bolts (inner and the big Allen bolt outer) Inner might be - 87 ft. lbs Outer is large allen???
4 torsion plate eliminator bolts (plate at each end of the torsion tube)
Large nut that goes on the stub axle (holds on the rotor assembly) - 217 lbs
Shock Bolts
Limit strap bolts

Blue Loctite for everything that's not a lock nut I am sure...


Once I get them all on and tight I will take a few pics... I still need the seat brace tube and I want to add a brace for the bumpstop and might add one more for the shock mount... but going to wait till after the first of the year..

thanks guys.. I'm getting there


Top
 Profile  
 
 Post subject: Re: Rail Buggy Upgrade
PostPosted: Thu Dec 20, 2012 2:00 pm 
Offline

Joined: Sun Jan 08, 2012 4:37 pm
Posts: 474
Location: Southern Indiana
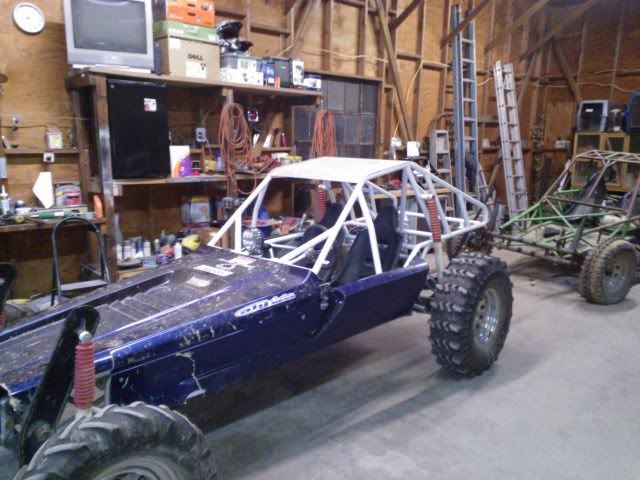
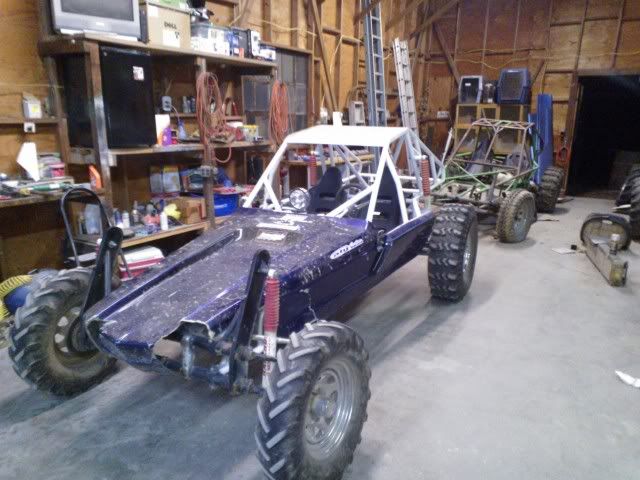
Few Pics Of where I am:

Image

Image

Image

Will add the axles and trans tonight I think.. then I will sit it back on its wheels... Still need to weld in the seat brace and a few other things... then I move to the seating area... I want to adjust how the seats sit in the buggy... more on that later.


Top
 Profile  
 
 Post subject: Re: Rail Buggy Upgrade
PostPosted: Thu Dec 20, 2012 2:30 pm 
Offline
User avatar

Joined: Thu Jan 26, 2012 7:32 am
Posts: 815
Location: Tcounty Ohio
That turned out great!


Top
 Profile  
 
Display posts from previous:  Sort by  
Post new topic Reply to topic  [ 455 posts ]  Go to page Previous  1 ... 10, 11, 12, 13, 14, 15, 16 ... 19  Next

Board index » General » Buggy Builds

All times are UTC - 5 hours [ DST ]


Who is online

Users browsing this forum: Google [Bot] and 4 guests


You cannot post new topics in this forum
You cannot reply to topics in this forum
You cannot edit your posts in this forum
You cannot delete your posts in this forum
You cannot post attachments in this forum

Search for:
Jump to:  
cron
Powered by phpBB® Forum Software © phpBB Group